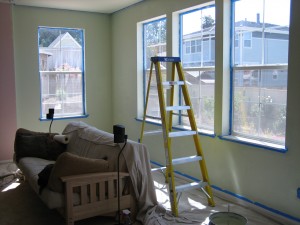
It’s time to share a little bit more progress on the family room painting project. I’m happy to say we are probably about 2/3 done now. We tackled the outer wall with the windows last weekend. This area required a lot of prep work because we had to remove the blinds and hardware and tape of the windows. Sounds pretty obvious, but the prior owner didn’t bother, as evidenced by the pink paint here and there on the blinds, outlet covers, and wall switches. The room actually looked great when we removed the blinds early in the morning. It felt really open and you could gaze upon the gorgeous backyard. That feeling did not last long into the afternoon as the sun started beating in. It was brutal trying to paint in the scorching heat with the sun glaring in! Here’s the work-in-progress. I believe this is actually just after the second coat was finished, so we were just waiting for it to dry so we could remove the painters tape and put things back together.

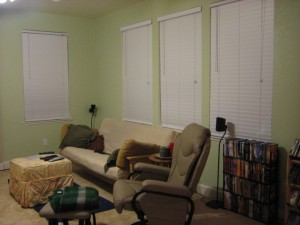
And here’s the finished wall. Of course, there still is one large pink corner left in the room. We’ve saved it for last because it’s the corner housing the television and components, and it’s not going to be fun to untangle that mess of cords and get it out of the way to paint without fear of drips on precious AV equipment.

Fingers crossed we can do that last corner all at once. My hope is that it won’t be too bad because there aren’t a lot of windows or edges so it should go quickly. Of course, my hope with the window wall was that it would go quickly because there was not much surface area to cover . . .
2009 © The Beehive All Rights Reserved

there’s always something that prevents things from being as easy as you hope they will be. at least you have a home to paint and paint to paint with. all houses are something of a money pit, but they’re yours. 🙂
If you are having the problem of not getting clean lines when you peel the masking (most of the time I find the tape takes some paint with it and chips), pull the tape before the paint is dry… I’ve gotten much better results that way.
Thanks for the tip! I’ve read that, and I’ve also read, if you wait for the paint to dry before removing the tape, you should guide a utility knife along the edge of the tape as you are pulling it off so you get a clean separation between the tape and the wall without pulling the dry paint off (which is what we did this time). The dry method seemed to work better around the baseboards than around the ceiling. Next time we’ll try the wet method.
I like the utility knife idea 🙂