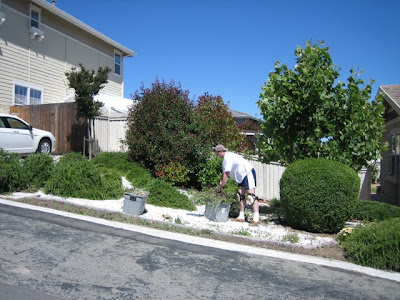
Finally Finished

Well, mostly finished, mostly.

Of course, we finished lining the edge of the path with cobble stones in pretty short order after our last post.

But we had no intention of leaving the rest of it just dirt.  I’ve been doing tons of research pretty much since we started removing the old landscaping rock over a year ago about low-maintenance, low-water plants that would be suitable.  We ultimately decided to go with a Mediterranean look, since California is a Mediterranean climate and those types of plants should thrive here without much tending.

If you’ve been reading for a while, you know that we already had grapes planted, so that worked out great with our theme.  We also got five half wine barrel planters last summer from a Sonoma-area winery thanks to Steve’s parents, who live in the north bay.  (I highly recommend going to a winery for barrels if that is feasible, rather than paying $40+ at HD, Lowes, or other hardware stores.  Our cost was significantly less.)  We planted rosemary and lavender in them, with some creeping thyme as ground cover between them, and then didn’t blog about it.

Another thing we didn’t blog about is happening on the other side of the yard.  We planted lamb’s ear (stachys) and some purple salvia of unknown species, which hasn’t flourished quite as much as the lambs ear.

The more recent additions include blue fescue (fesctuca glauca), blue oat grass (helictotrichon sempervirens), yarrow (achillea millefolium), euphorbia, artemesia, dusty miller (senecio cineraria), campanula, sedum, rue (ruta graveolens), daylily (hemerocallis), snapdragons (antirrhinum majus), curry plant (helichrysum italicum), phormium, artichokes, and culinary sage and oregano.  There are also two tomato plants Steve’s mom gave us, but those are temporary for the summer.  Pretty much everything else we chose is a perennial, so we won’t have to replant every years.

Finally, with the help of our friends Abby and Roxanne, we put mulch over the whole thing.  Well, mostly the whole thing, mostly.  There are a few areas left un-mulched because (1) after running out of mulch the second time I did not want to go back to the store and (2) I’ve ordered a few other things that are going to ship in the fall that will be planted in some of the uncovered areas.

So how are we just mostly finished, if there is nothing more to plant until my order arrives in the fall?  Irrigation.  I originally planned for no irrigation.  I don’t think Steve was on board with this, and in retrospect, he was right. The majority of the plantings won’t need anything but rainwater once they are established.  I thought we could live with watering them by hand until the rain comes and by next summer, they won’t need the water.  That’s been going on a week or two now, and let me tell you, it takes forever.  So a drip system is going in, even if it is temporary.  Plus, I have since learned that even though native climate plants will not die with no additional water, they will really thrive if they do get it.  So maybe it won’t be temporary.

© 2011 The Beehive All Rights Reserved

Follow the Cobble Stone Road

This weekend, not surprisingly, we continued working on the new path in the front yard.  We had two main goals: (1) to loosen up the soil and mix in the soil amendment and (2) to line the path with cobble stones to define its edges.

We already had a big pile of soil amendment sitting in the driveway, which we had delivered with the birds eye gravel a few days ago.  We didn’t have the cobble stones delivered at the same time, though, and here’s why.  First, I calculated that we needed 1/2 a cubic yard of cobble stones to line the edge of the path, but the landscape supplier will not deliver less than 1 cubic yard of any given material.  Second, the delivery trucks only have two bays, so they can only deliver two different materials at a time.  Since we were already having gravel and soil amendment delivered, it would have been an additional delivery (at $50 a pop) and we would have had to buy twice as much as we needed.  No thanks.

The gentleman I spoke with at the landscape supply place suggested that we come in and bag some cobble stones ourselves.  That way, we would not incur extra delivery costs or have a ton left over.  Plus we would be able to avoid broken stones, and actually pick out the nice looking stones.  So we did.

I wish I had brought my camera, but maybe a description of the place would suffice.  Essentially, there are many bays created by cinder block walls, each one filled with a different material, gravel, rocks, barks, sand, dirt, you name it, they have it.  We backed my car right into the bay filled with large cobblestones, put our bags in the back seat, and started filling them up, stone by stone.  We were warned to put the bags in the car and then fill them, because there is no lifting those things once they are full.  I would also suggest bringing gloves.  I don’t know what we were thinking not bringing any, since we use work gloves for practically everything.  They certainly would have come in handy.  Also, sensible shoes.  Climbing all over a giant pile of cobble stones in flip flops was probably not the smartest thing I’ve ever done, and I’m lucky I didn’t smash any toes.

After a few other errands, we did finally get to work on the yard, but we only got about half way through what I thought we could accomplish this weekend.  We mixed the soil amendment into the lower part of the yard and lines one side of the path.  I think it looks pretty good; we just need to finish the other half and get some plantings in there.  I don’t see anything happening until next weekend though, and I can imagine our neighbors complaining any minute now about the pile of soil amendment still in our driveway.


© 2011 The Beehive All Rights Reserved

Bonus Path Post!

I really didn’t think we’d have much to add right away on the path progress, but it looks like things are moving right along!

I had two cubic yards of bird’s eye gravel delivered yesterday morning.

It was hard to watch the delivery guy dump a huge pile of gravel on the driveway because, as you may recall, we already have another huge pile of rocks that used to be in the front yard that we are trying to get rid of, slowly but surely.

Anyway, I thought I might surprise Steve by having the whole path filled in when he got home from work.  I got started first by laying the weed block down on the path area.  This was a little bit tougher than I thought.  Because the path is all curvy, I had to cut the weed block into many pieces to make it fit, rather than just rolling it out as I would have been able to do if the path was just a straight line.  This meant I needed a lot more cramp-ons (giant staples you hammer into the ground to hold down the cloth).  It also took a lot more weed block than I originally calculated because you have to overlap by several inches at each joint, and I had not considered that the curve would require so many joints.  So, that meant a trip to Home Depot.  And, because I’m conscientious about time and gas, I packed in a few more errands while I was out, which meant I didn’t really even get to working on this until after 6PM.

Okay, back to the actual path construction.  I ended up with two rolls of weed block, 3 feet wide by 50 feet long, and 40 cramp-ons altogether.  Since the path is 4 feet wide, I cut the weed block in pieces 52 inches long, so there would be a couple of extra inches on each side of the path.  Then I just started laying them down, overlapping by at least 2 inches, and often more to accommodate the curve.  This is what it looked like when I was done:

Then came the “easy” part.  I just started loading up the wheelbarrow with gravel and dumping it over the weed block.  When I say “easy,” I mean easy once you get the hang of it.  Also, “easy” in the sense that’s it’s not rocket science, as opposed to it not being tiring and tedious work.

I learned a couple of things.  One is not to overfill the wheelbarrow.  Just because there is physically more room in the wheelbarrow does not mean you will be able to control it.  In fact, you will likely end up tipping it over accidentally and dumping gravel exactly where you don’t want it.  Two is to dump the gravel in from the lower side of the slope, rather than the upper.  It’s a little easier to empty from the upper side, but again, harder to control, and if you lose control you’ll end up crushing the bender board edging, requiring emergency repairs.  Steve helped with both of these situations when he got home.

Last night I think I got maybe a third of the way done.

I started back at it this morning and finished shortly after 1pm.

Of course, it’s not quite finished.  I did tamp it down some to settle the gravel a bit, but we’ll probably need to do that a bit more, and perhaps wet it while doing so.  Then we’ll fill in any sparse area with leftover gravel.  We’re also going to line the edges with cobble stones to give it a rustic look.  And of course, all the dirt around it needs leveling, and the addition of some soil amendment (you might have noticed a big pile of dirt on the driveway in some of the pictures), and of course, plants.  But reasonable progress, I think.

© 2011 The Beehive All Rights Reserved

The Path to Nowhere

Last summer, we shared a lot of work we did on a part of our front yard.  It took us weeks — maybe it was actually months — to clear our yard of ugly white landscaping rock, overgrown rosemary, and weeds.  By the time we were done, we were too tired to actually replace anything we removed with something new.  We took a little vacation from yard work, did some upkeep on other areas that we had been neglecting, and before we knew it, the bad weather was upon us.  So the space sat idle for months with nothing more than occasional weeding.


Now that it has stopped raining and the weather is actually behaving somewhat like we expect it to in June, we are back outside.  Part of our plan is to create a winding little gravel path.  We thought it would be visually interesting, provide access to the interior areas of the space, and provide a bit of a low maintenance area (no watering and easy weeding with no actual plantings).  We did the excavation of the path area recently.

We (read: I) did some research as to how to DIY a gravel path.  We (I) decided to follow the instructions in an old edition of the Sunset Western Landscaping book.  In a nutshell, it suggested excavating down about 3 inches, installing some sort of edging, adding a 1-inch layer of sand, tamping it down, then adding a 2-inch layer of your desired gravel. Pretty easy, right?

Day 1 of our project involved excavating the upper side of the path and installing our edging.  We chose 4″ redwood bender board (which is actually only 3.5″, not 4″ — where did the lumber industry learn how to measure?).  We had already marked off the area where we wanted the path to go with some landscaping stakes and string.  Actually, it was so long ago, the string was long gone.  So we just connected the dots of the stakes with a gentle curve and held the bender board in place with more of the same landscaping stakes.

The bender boards were originally 8′ long, but we found we had to cut some of them shorter because we could not get the curve we wanted and stay level with the slope without twisting the board.  We also overlapped the boards by a couple of inches at each joint to prevent dirt from seeping or gravel seeping out through the seams.

So this is what we had at the end of Day1:

We were pretty pleased.  It didn’t look bad and it didn’t really take all that long.  We were confident we’d have no problem finishing the excavation on Day 2.  Well, the second day ended up being a little bit harder than we expected.  It involved a lot more measuring because we wanted to make sure the width of the path was consistent.  Plus, in addition to just digging the sides and installing the bender board, we needed to dig out the whole middle of the path and make sure it was nice and even and level (we used a 10″ square hand tamper to help with that).

It took us pretty much all day, but we reached our goal of getting the structure of the whole path in place.  All we need to do now is order the fill materials and dump them in.

© 2011 The Beehive All Rights Reserved


An Orange for All Seasons

Normally, I don’t mind cold, rainy weather.  I think it’s wearing on me a bit now, seeing as it is June.  Mother Nature did cooperate a bit over the long Memorial Day weekend, and we took the opportunity to do something in the yard besides keep the weeds at bay.  We planted a couple of citrus trees in the back yard.

Our property is sort of on a hillside, so on the west side of the yard, there is a retaining wall and a little hillside.  There are also a few semicircular planters.  When we moved in, they were filled with geraniums.  I don’t have a problem with the way geraniums look, but I cannot stand the way they smell.  I hated trimming them because of the smell, so they got really out of control.  Needless to say, we wanted to remove them.

So we did remove them.  And those planters have been sitting empty since last summer.

We always intended to put a few citrus trees in, but based on our research, the best time to plant citrus is April.  Well, April came and went, and May almost did too.  Thankfully, local garden centers seemed to have plenty of healthy-looking citrus trees the size we were looking for, so we figured we probably weren’t too late to give it a shot.

Before we started any digging or planting, we made a couple of watering stakes.  We wanted to use watering stakes to encourage the roots to grow down, rather than out.  But for a piece of plastic with holes in it, we figured we could make it ourselves for less than buying a ready-made one (note: the one in the link was actually more expensive at the brick-and-mortar Home Depot).  So we bought a 10-foot piece of 1.5″ PVC and cut it into three pieces.  So each finished stake would be just a bit longer than a yard.

Next we drilled staggered holes on 3-inch intervals with a 3/8″ drill bit.  On the bottom third of each stake, we used a smaller bit, probably about 3/16″, to drill additional holes at regular intervals between the large holes.  We finished it off by gluing a cap to the bottom and adding a removable cap to the top (it will keep out dirt and debris, but we can remove it to water).  We made three stakes for roughly the price of one at the store.

Once the stakes were ready, it was time to start digging.  We dug holes about twice the size of the container, and also used a post hole digger to add a deep, narrow hole for the watering stake.  I don’t have pictures of this because I was busy, and my hands were muddy.  But if you’ve seen one hole, you’ve seen them all, right?

We mixed the soil we removed from each hole with some amended garden soil in a proportion of 50-50.  We also mixed in some controlled release fertilizer (we used Vigoro Citrus and Avocado Plant Food, following the package directions to determine the proper amount).  We placed the watering stake and the root ball in their respective holes, and filled in the cavity with our soil mix.  Finally, we watered, created a watering trough ring around each tree, and covered the area around the base with bark mulch.

Both the trees we planted were oranges, but we chose two different varieties so that (once the trees mature enough to start producing) we would have fresh oranges for a longer period of time.  One tree is a Washington Navel, which ripens from winter through early spring, and the other is a late harvest Valencia, which ripens in early spring to summer.  Assuming these trees do well, we should have fresh oranges from our own trees for more than half the year.

© 2011 The Beehive All Rights Reserved

Oh Poop!

Steve and I don’t have any pets.  I can’t speak for Steve, but for me personally, reason numero uno why I don’t really even want a pet is poop.  I have zero interest in picking up poop.  You can ask my parents.  They will tell you, when I was younger and we had a dog, I don’t think I ever performed “poop patrol” in the backyard.

The weather was nice out this weekend, so I spent a fair amount of time working in the yard, and let me tell you, I ended up picking up more than my fair share of poop!  In the backyard, I believe I found cat poop in seven different locations.  And this was not like the cat dug a hole, pooped, and tried to bury it; this poop was just sitting there.  Like, right on the cement patio outside the garage door.  And on the retaining wall.  And on top of the lava rock ground cover.

Wanting to minimize future incidents of pet poop in our yard, I used the google to see if anyone out there on the interwebs had any suggestions.  I did find one site that had a multitude of them.  My favorite suggestion was placing “pot plants” in the area where the kitty is pooping.  I’m pretty sure the author meant potted plants.  We do not have any pot plants.  None.  If we did, we certainly would not be placing them around the backyard where they might be visible to law enforcement from outside of our property.  Or to our friend the FBI agent when he comes over to visit.  But like I said, no pot plants here.

Other than that, there seem to be a number of viable options.  The only problem is, these poops were not isolated to specific places, they were just randomly all over the yard.  So placing things like cinnamon or citrus peel or commercial cat repellent in the area where the cat is pooping pretty much means putting it all over the yard.  I’m thinking of maybe putting different repellents in different areas of the yard to test which are most effective.  Does anyone have experience with this?  What works and what doesn’t?

© 2011 The Beehive All Rights Reserved
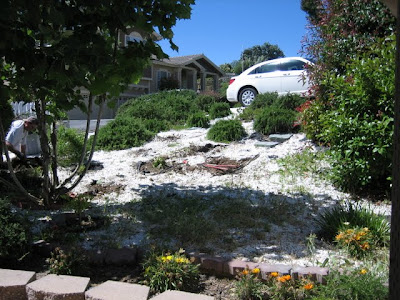
I Heard it Through the Grape Vine

Obviously, we’ve been working a lot in our front yard.  Well, maybe obvious to us because we’ve put in the work, but not so obvious to our neighbors who still have to look at an eyesore of a yard.  It seems like it has taken us forever just to remove all the ugly stuff that was there when we moved in, from bright white landscaping rock, to overgrown rosemary, to weeds.  Well, we finally got to a point where we were ready to add something back in, and we happened to snag a couple of Red Flame grape vines from Costco.

Once we purchased the vines, we were a little bit ahead of ourselves.  We needed something for them to grow on before we could plant them.  We searched the internet for various DIY designs for grape trellises and took the best bits and pieces to create a trellis that suited our needs.  Here are the materials we used:

  • Two 4×4 posts, 8 feet long each
  • Two 2×2 posts, 8 feet long each
  • Wood preservative
  • 10 eyelet bolts, with nuts, about 1/4 inch in diameter
  • 20 1/4 inch washers
  • 5 turnbuckles, about 5 inches long when open
  • 14 guage wire

The first thing we did was treat the posts with a wood preservative.  Our posts are redwood, since it holds up well outdoors, so we chose a preservative with a redwood stain to it.  Specifically, Preservawood in Pacific Redwood.  Preservawood is a low-VOC formula, so you won’t be breathing in horrible fumes while you treat the wood and it won’t leach toxic chemicals into the soil once you have the posts placed.

Next, we had to set the posts in the ground.  We wanted them sunk down two feet, so six feet would be exposed for the trellis.  Using a post hole digger, we dug down about 28 inches for each post, and spaced the holes about four feet apart (so the trellis is 12 feet long, from end to end).  The two 4x4s were used for the outside supports, while the 2x2s were used on the inside.

The reason we dug the holes a bit deeper than two feet is that the method we decided to use for setting them involved placing a few inches of gravel on the bottom, then several more inches around the bottom of the post.  But where would we get gravel?

We just happened to have some lying around.   Anyway, we put four inches of gravel at the bottom of each hole, then placed the posts in, used a level to make sure they were straight, then filled around the bottom of the post with gravel for another six inches or so.  Then, we packed the rest of the hole with the dirt we dug out of it, periodically using the level to make sure the post was still straight.

Next, we drilled holes in the posts to stretch the wire across.  We planned on five wires, starting about two feet off the ground and ending about two inches from the top of each post, so we spaced the holes approximately evenly over this space.

On the outside posts, we put eyelet bolts through and secured them each with a nut.  We put a 1/4 inch washer on either side of each bolt in an attempt to not damage the wood as we tightened the nut.  We planned to just run the wire through the holes in the two smaller posts, since the larger, outer posts were really the major supports for the wire.

Next, we attached a wire to each eyelet (each of these wires was about half the length of the trellis as a whole, so maybe six feet, give or take, with a little extra just in case).  We threaded the wire through each eyelet, bent it with about a three inch overlap, and coiled the overlap around the other side of the wire using a vice grip.  They all looked like this when we were done.

Since each of the wires we threaded through the eyelets was about half the length of the trellis, we needed a way for the left to meet the right in the middle, and we decided to use a turnbuckle for each set of wires.  Maybe Congress could use a few turnbuckles?

In case you were wondering what a turnbuckle is, here is a description from Wikipedia:

A turnbuckle, stretching screw or bottlescrew is a device for adjusting the tension or length of ropes, cables, tie rods, and other tensioning systems. It normally consists of two threaded eyelets, one screwed into each end of a small metal loop, one with a left-hand thread and the other with a right-hand thread. The tension can be adjusted by rotating the loop, which causes both eyelets to be screwed in or out simultaneously, without twisting the eyelets or attached cables,

We coiled a wire from the left side to one end of the turnbuckle and a wire from the right side to the other.  We pulled them as taught as well could initially, but then we still had the ability to adjust the tension even more by rotating the loop on the turnbuckle.

So there you have a pretty basic trellis!

After all that work we still had to plant the grapes.  We tilled the soil with a Mantis tiller, added some soil amendment, and tilled again.  The we just dug a couple of holes and popped the plants in.  Finally, we untied the vines from the bamboo support from the nursery pot and started training them along the new trellis with a little string. I think it looks pretty nice, and has a lot of potential if we don’t kill the grapes and they keep growing up the trellis.

Of course, the rest of the front still looks pretty dreadful.  Baby steps!

© 2010 The Beehive All Rights Reserved
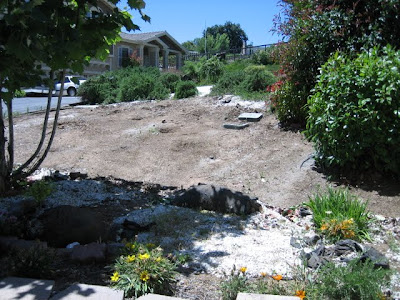
Whose Idea was This Anyway?

I’m talking about the front yard.  Progress has been rather slow for a while.  Steve injured himself pulling out rosemary and really had to take things easy for about two weekends, so not a lot got done.  Plus, we didn’t do a whole lot on the long 4th of July weekend because we were, you know, having fun.  Not that toiling in the yard under the hot summer sun isn’t super fun . . .

We have actually accomplished quite a bit, though, thanks to the Mantis tiller we borrowed from Steve’s parents and my parents’ offer to help us dig out a large shrub.  Specifically, this large shrub:

Its roots looked significantly more daunting than the rosemary we had spent all that time digging out.  Plus, there was a sprinkler right underneath it we would have to be careful not to damage.  It started to make me think of the monolith from 2001: A Space Odyssey.

We started out on our own by just slowing soaking the ground around it and digging in.  It seemed like we didn’t do much but create a moat around it.

My dad has some experience with stump removal, so when he offered to help us get this one out, we jumped at the chance.  He brought a special tool:

That metal thing with the red handle is a fancy ratcheting thingy.  And yes, that is a technical term of art.  Essentially he wrapped a chain around the based of the roots to the ratchet, then a rope from the other end of the ratchet to a stationary object (we used the trailer hitch on Steve’s car).  Pull the ratchet a few time, and the stump comes right out.  Well, maybe it’s not quite that easy, but I decided I wanted to take a picture of the process and when I got back with my camera this is what I saw.

It was that quick.  What we were thinking digging out the rosemary without this handy helper?!?  To be sure, we put it to use on the rest of the rosemary in the front. Here’s my dad, and Steve’s car, working on that.

So we are pretty much done removing stuff and have a clean slate to start laying out the new yard and planting stuff.

Ok, ok, we have actually started planting a little bit, and it looks pretty good.  But that’s for another post, so stay tuned!

See our yard progress from the beginning here and here.

© 2010 The Beehive All Rights Reserved

More Yardage

We continued with our work on the front yard this past weekend.  Thankfully, it was not nearly as hot as last weekend (although I did neglect to wear sunscreen on Sunday and got a bit burned!).  Last weekend, we cleared out scattered rosemary bushes and white landscaping rock from the center of the yard area.  This weekend, our goal was to remove the mature rosemary and white landscaping rock from the top of the slope.

The mature rosemary plants were much more of a struggle than the smaller ones we removed last week.  The roots tend to grow sideways, which meant we did not have to dig terribly deep, but there were a lot of roots and some of them were very large.

Steve also somehow twisted his elbow pulling out those big plants, so he was mostly sidelined on Sunday.  That meant I did the majority of the rock-shoveling and carrying it into the back.  Tough work for one person!

Here’s what are neighbors are looking at now:

Next weekend we’ll be heading down to the bottom of the slope.  Hopefully we can clear the last of the rock, but I’m sure the remaining mature rosemary will be an ordeal, as will the large, unidentified bush in from of the Mulberry tree, so it may take us a while to get that done.

© 2010 The Beehive All Rights Reserved

Yard Work

This weekend was a hot one in our neck of the woods. That didn’t stop us from getting outside and doing some work in our front yard, though. We’ve been unhappy with the look of it since we moved in, and our neighbors are not too thrilled with the white landscaping rock the prior owner was so fond of. Here’s a look at the area we’ve decided to tackle first just as we were starting on Saturday morning.

On Saturday, we pulled out all the “volunteer” rosemary. Rosemary bushes were planted around the edge of the yard area, but they self-seeded and created little mini-bushes — and some not so mini — all over the center of the yard. The weather was great and a strong breeze kept us cool while we worked.

Sunday, we cleared a bunch of the offensive white landscaping rock from the part of the yard we cleared of rosemary the previous day. This was a real chore. I don’t think we ever came up with a really efficient way to do it. We tried rolling up the weed barrier with the rocks in it, but they spilled out the edges. Further, the prior owner didn’t use conventional weed barrier for the entire yard; in some places, flattened out bags from mulch or potting soil were used, and we even found Home Depot shopping bags in some places. We also tried using the weed barrier to move the rocks into piles, which we then shoveled into buckets, but that seemed to take a long time as well.  And, we were left with this nifty pile to deal with when we were done.

So here’s what our neighbors have to look at now, until we get back to it next weekend. Probably won’t get any better, since we’ll just be pulling out the mature rosemary and removing still more rocks. But we’ve got plans, and it will eventually come together, slowly but surely.

© 2010 The Beehive All Rights Reserved