Book Review: The House Always Wins

thehousealwayswins

In The House Always Wins: Create the Home You Love–Without Busting Your Budget, author Marni Jameson takes readers through the process of creating a home by sharing her own home-ownership experiences.  She shares the struggle of creating a stylish and inviting home that is functional for her family, offering up what she learned from her mistakes as well as advice from the pros.  The result is an entertaining read than first-time home owners will find helpful as a guidebook to creating and maintaining a home.

Although Jameson is an award-winning nationally syndicated home design columnist, her stories humanize her and demonstrate that even people who deal with home design for a living are prone to the same issues run-of-the-mill folk face in appointing their homes.  She details agonizing over the multitude of different floorings available to choose from at the home design center, as well as the disaster of fly-by-night landscapers taking off with her money after creating a giant sink hole in her yard.

Like any contractor, Jameson begins with a foundation, building her book from initial decisions a homeowner must make that can be expensive, time-consuming, or down-right impossible to change.  For example, location is key, and it does not matter how richly appointed an interior is if you hate the city you live in, and that is not easily changed.  Similarly, finishes like flooring and cabinetry are very difficult to change, but at the same time can have a huge impact on what you can do with a space, so they need to be chosen carefully.  Once you’ve got a backdrop to work with, she brings in furniture, providing insight into buying quality pieces that will work for you without getting ripped off.  Finally, she discusses accessories and other finishing touches that make a room feel warm and inviting.  She even provides information for holiday decorating and specific-purpose rooms.  And all of this keeps in mind the fundamental process of determining one’s own personal style and keeping it in mind so as not to be swayed by fads or styles that may look great in the showroom, but ultimately will not appeal to the homeowner over time. 

The book does lack a level of specificity.  I found myself from time to time thinking, “ok, I see this is something I need to look into, or watch out for, but how do I do that?”  However, given that it covers such a broad range of topics, this is a minor shortcoming.  One book cannot possibly cover in depth each and every topic Jameson addresses.  This is not so much a how-to book, but a general overview of what a homeowner will need to know and/or learn in order to be successful in creating a pleasing environment.  In other words, it might not have all the answers, but it helps you figure out what the questions are and where to start looking for answers. 

Overall, this was an enjoyable, quick read that provided a considerable amount of useful and interesting information about choosing a house and appointing such that you get a functional end product you are happy with.  I would certainly recommend it to anyone just starting on the process of creating a home.

2009 © The Beehive All Rights Reserved


Hot Hot Hot

This weekend, temperatures soared to 103 in our neck of the woods.  We are equipped with AC, but we try to avoid using it and save energy by strategically opening and closing certain parts of the house at certain times of the day and running fans to keep air circulating.  Since the house is fairly new and well insulated, this typically works pretty well. 

Yesterday was too much, though.  We lost power mid-afternoon, and it was sweltering.  We decided to take a field trip to the auto parts store and the hardware store to get some odds and ends, and took our time browsing so we could take advantage of the AC.  By the time we got home, power had been restored, but we could not seem to get the air circulating to bring the cool evening air  in to the house.  We broke down and cranked up the AC in the bedroom so we could get some sleep. 

I understand temps were pretty similar all over the Bay Area this weekend.  Anybody do anything really effective to keep cool?

2009 © The Beehive All Rights Reserved

Still More Painting

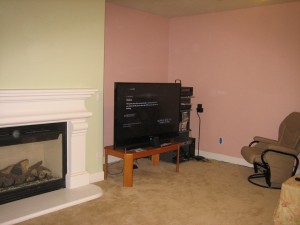
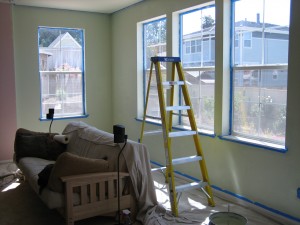
It’s time to share a little bit more progress on the family room painting project.  I’m happy to say we are probably about 2/3 done now.  We tackled the outer wall with the windows last weekend.  This area required a lot of prep work because we had to remove the blinds and hardware and tape of the windows.  Sounds pretty obvious, but the prior owner didn’t bother, as evidenced by the pink paint here and there on the blinds, outlet covers, and wall switches.  The room actually looked great when we removed the blinds early in the morning.  It felt really open and you could gaze upon the gorgeous backyard.  That feeling did not last long into the afternoon as the sun started beating in.  It was brutal trying to paint in the scorching heat with the sun glaring in!  Here’s the work-in-progress.  I believe this is actually just after the second coat was finished, so we were just waiting for it to dry so we could remove the painters tape and put things back together. 

familyroompaintinginprogress

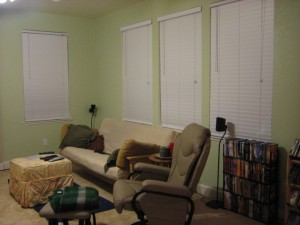
And here’s the finished wall.  Of course, there still is one large pink corner left in the room.  We’ve saved it for last because it’s the corner housing the television and components, and it’s not going to be fun to untangle that mess of cords and get it out of the way to paint without fear of drips on precious AV equipment.  

2-3rdspaintedfamilyroom2

Fingers crossed we can do that last corner all at once.  My hope is that it won’t be too bad because there aren’t a lot of windows or edges so it should go quickly.  Of course, my hope with the window wall was that it would go quickly because there was not much surface area to cover . . .

2009 © The Beehive All Rights Reserved
Backyard Bounty


It looks like the backyard may yield a fair amount of fruits and veggies for our eating pleasure this year, and we haven’t even done much to it in terms of amending the soil, new planting, etc.

There were several fruit trees here when we moved in.  We’ve got three trees that appear to be citrus of some sort, one of them with fruit on it.  It looks like lemons, but it’s hard to tell until they either turn yellow or don’t.

lemonmacro1

There’s also a nectarine, which is one of my favorites.  It looks like it’s got a problem with some curly leave disease, so we’ll have to take care of that, but it’s still got fruit on it that I can’t wait to eat.

nectarinemacro2 nectarinemacro1

There is a persimmon as well.  Did you know that persimmons were known in ancient Greece as “fruit of the gods”?

persimonmacro2 persimonmacro1

Then there is the mystery bush.  It’s got tiny berries on it that look dark purple or black when ripened.  They may or may not be edible, but we are staying away from it for the time being.

Of course, we planted a few things ourselves.  Three tomato plants, a cucumber, and some strawberries, to be exact.  The strawberries may be done.  We previously posted pictures of the small berries, but they’ve since been eaten.  One of the tomato plants has some fruit on it, as does the cucumber.

cucumbermacro1 tomatomacro1

2009 © The Beehive All Rights Reserved
Clever Cobweb Removal

You’re about to get another sneak peak at our entryway (we already showed you the hat and shoe rack we put there).  One of the great features of our house is it’s openness, which includes a large entry area open to the staircase and second floor.  It’s very nice, but when cobwebs form in the certain corners, it’s very difficult to get to them because they are so high up. 

A brief digression:  A few weeks ago, I’m sitting in the family room watching tv, and I hear this whirring noise coming from the front of the house.  Upon investigating, I discover Steve flying his small, foam RC helicopter in the entryway!  He took it up from the floor past the pendant light, over the banister to the upstairs hall, and into our bedroom.   This has become a not infrequent occurrence. 

Do you see where I am going with this?  This weekend, he was flying the helicopter and decided to take it right up into the corner to clear out the cobwebs.  Those rotor blades wrapped the web right up.  Of course, once that happened, the chopper dropped like a rock, but at least the corner is clean now. 

cobweb1 cobweb2

Clever, huh?  Have you discovered any unique ways to make cleaning a game a-la Mary Poppins?

2009 © The Beehive All Rights Reserved

Paint it Green

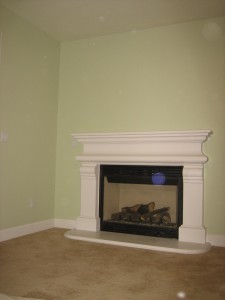
You might remember that we removed the curtains from the family room and painted the ceiling a pale green a while back.  Well, we’ve now started on the walls.

halfpaintedfamilyroom2

The color is Glidden’s Sea Drops, which is a little bit darker than the Iced Cilantro on the ceiling.  We are hoping some crisp white crown molding will make that distinction pop. 

And you’re right, I did say started with the walls, which clearly implies we are not finished.  So we’ve got a half green, half pink room.  Nice!  We’ll continue working on this project and keep you posted.

halfpaintedfamilyroom1

2009 © The Beehive All Rights Reserved

Stewing Around

finishedbeefstew

Last week, we decided to do a basic beef stew in our slow cooker.  We are both big fans of Dinty Moore beef stew, so when we came across this recipe, we had to try it.  Here are the ingredients:

  • 4 carrots
  • 1 onion
  • 12 oz. small red potatoes
  • 9 oz. bag frozen cut green beans
  • 1 can cream of celery soup
  • 1 can beef broth
  • 1/2 tsp. dried marjoram
beefstewmisenplace beefstewchoppedveggies

The whole thing was pretty simple to throw together.  I chopped up the carrots, onion, and potatoes and threw them in the slow cooker pot with the marjoram, cream of celery, and beef broth and stuck it in the refrigerator overnight.  I pulled it out and plugged the cooker in before work and let it cook on low heat for 9 hours (our slow cooker automatically turns down to “warm” once the cook time has been reached).  At least that’s what I thought I did.  When we got home from work, I was all set to turn the cooker to high, add the green beens, and cook for an additional 20 minutes.  But it was already on high!  Not sure how that happened, but we pressed on and cooked it with the green beans another 20 minutes. 

beefstewincooker  finishedbiscuits

Amazingly, I don’t think the too high, too long cooking did much to it.  None of the veggies were mushy and overcooked, and the meat was fine too.   Alas, Dinty Moore it was not.  We’ll keep trying different beef stew recipes until we find one as good or better.

No fancy inspiration for a bread product this week, though.  We had plain ol’ buttermilk biscuits from a can.

2009 © The Beehive All Rights Reserved

Mulch it Over

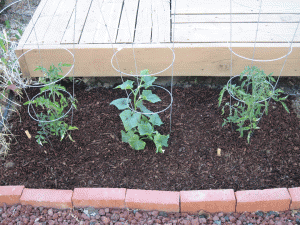
It’s been a few weeks since we put our two tomato seedlings and cucumber in the ground, and they seem to be doing pretty well. 

garden3

I’ve noticed a few weeds in the bed, though, and I think it’s time to add a little mulch to the top of the soil.  Here’s the after picture.

garden-4

Although I turned in some rich potting soil when I planted these babies, it seems to have blended in with the hard-as-rock dirt indigenous to our backyard.  The mulch certainly makes the top look a bit healthier and uniform.  Hopefully it will help the soil to retain moisture longer, and maybe even keep the weeds at bay a little bit by blocking the sunlight. 

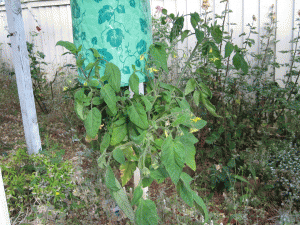
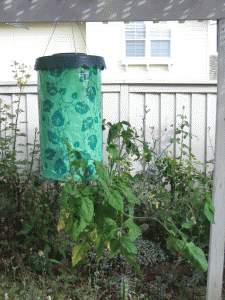
While I’m at it, I always take a look at the topsy turvy.  Still no actual fruit on it, just the blooms, but I wouldn’t have expected anything just yet anyway.

topsyturvy8 topsyturvy7

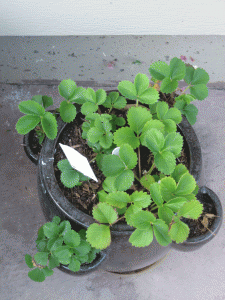
The strawberry pot looks good as well, but alas, some critter has eaten the fruit off of it.  I did get to taste one first. 

strawberry3

2009 © The Beehive All Rights Reserved

Window Woes Fixed With Film

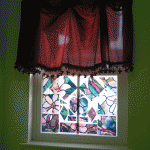
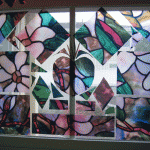
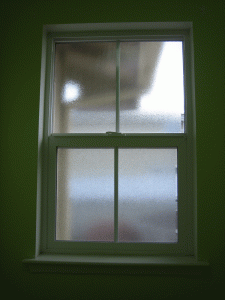
Our latest project will give you a sneak peak into part of our master bathroom.  We have a water closet separating the toilet from the shower, tub, and sink area.  The prior owner had a littled faux stained glass action going on.  But look closer.  She didn’t just apply a decorative window film, she cut the film into a mosaic-style design before applying it.  Oh, and isn’t the flourescent green paint fabulous?!?

windowfilm1 windowfilm2

Needless to say, we removed the decorative film, as well as the lovely valance.  Of course, that left us with a wide open view straight into the neighbors’ house, which happens to correlate to the neighbors’ wide open view into our bathroom.  Our answer happens to be more window film, but not of the stained glass variety.  We chose a textured glass pattern that blurs the view but still lets in sunlight.

windowfilm3


The process is pretty simple and fairly inexpensive.  The roll of film cost us about $20 and it covered this window plus half of another bathroom window.  To install, measure the window and cut the film to size.  I urge you to do a better job measuring than I did (you can see a sliver of window around the edge that didn’t get covered by film).  Make sure your window is clean, and spray it with water with a few drops of liquid soap mixed in.  Peel the backing off the film and wet that down with your diluted soap/water mixture as well.  Apply it to the window and wet it down on the outside one more time.  The third round with the spray bottle is to lubricate the outside so you can smooth it out and press out any air bubbles with a squeegee (a small one was included with the film kit).  And then you’ve got what looks like a textured glass window, but for the uncovered edge.  🙁  It still does the trick as far as privacy goes, though.

2009 © The Beehive All Rights Reserved

The Porch

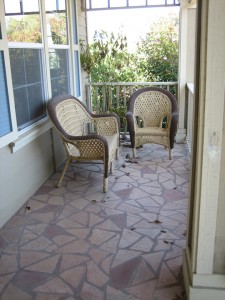
It’s time for part two of our house tour.  This is our porch.

porch1

The seller left us this all-weather wicker seating arrangement.   My brother tells me it’s quite comfortable and a great place to sit and relax.  Unfortunately, I have not been blessed with an opportunity to do so.

porch2

There’s definitely potential to make this porch more inviting.  I’d like to put some outdoor cushions on the wicker seats to add color and comfort.  A small side table to set a drink or a book while lounging would also be great.  Add a small area rug to define the seating area, and you’ve got something. 

2009 © The Beehive All Rights Reserved