Finally Finished

Well, mostly finished, mostly.

Of course, we finished lining the edge of the path with cobble stones in pretty short order after our last post.

But we had no intention of leaving the rest of it just dirt.  I’ve been doing tons of research pretty much since we started removing the old landscaping rock over a year ago about low-maintenance, low-water plants that would be suitable.  We ultimately decided to go with a Mediterranean look, since California is a Mediterranean climate and those types of plants should thrive here without much tending.

If you’ve been reading for a while, you know that we already had grapes planted, so that worked out great with our theme.  We also got five half wine barrel planters last summer from a Sonoma-area winery thanks to Steve’s parents, who live in the north bay.  (I highly recommend going to a winery for barrels if that is feasible, rather than paying $40+ at HD, Lowes, or other hardware stores.  Our cost was significantly less.)  We planted rosemary and lavender in them, with some creeping thyme as ground cover between them, and then didn’t blog about it.

Another thing we didn’t blog about is happening on the other side of the yard.  We planted lamb’s ear (stachys) and some purple salvia of unknown species, which hasn’t flourished quite as much as the lambs ear.

The more recent additions include blue fescue (fesctuca glauca), blue oat grass (helictotrichon sempervirens), yarrow (achillea millefolium), euphorbia, artemesia, dusty miller (senecio cineraria), campanula, sedum, rue (ruta graveolens), daylily (hemerocallis), snapdragons (antirrhinum majus), curry plant (helichrysum italicum), phormium, artichokes, and culinary sage and oregano.  There are also two tomato plants Steve’s mom gave us, but those are temporary for the summer.  Pretty much everything else we chose is a perennial, so we won’t have to replant every years.

Finally, with the help of our friends Abby and Roxanne, we put mulch over the whole thing.  Well, mostly the whole thing, mostly.  There are a few areas left un-mulched because (1) after running out of mulch the second time I did not want to go back to the store and (2) I’ve ordered a few other things that are going to ship in the fall that will be planted in some of the uncovered areas.

So how are we just mostly finished, if there is nothing more to plant until my order arrives in the fall?  Irrigation.  I originally planned for no irrigation.  I don’t think Steve was on board with this, and in retrospect, he was right. The majority of the plantings won’t need anything but rainwater once they are established.  I thought we could live with watering them by hand until the rain comes and by next summer, they won’t need the water.  That’s been going on a week or two now, and let me tell you, it takes forever.  So a drip system is going in, even if it is temporary.  Plus, I have since learned that even though native climate plants will not die with no additional water, they will really thrive if they do get it.  So maybe it won’t be temporary.

© 2011 The Beehive All Rights Reserved

Follow the Cobble Stone Road

This weekend, not surprisingly, we continued working on the new path in the front yard.  We had two main goals: (1) to loosen up the soil and mix in the soil amendment and (2) to line the path with cobble stones to define its edges.

We already had a big pile of soil amendment sitting in the driveway, which we had delivered with the birds eye gravel a few days ago.  We didn’t have the cobble stones delivered at the same time, though, and here’s why.  First, I calculated that we needed 1/2 a cubic yard of cobble stones to line the edge of the path, but the landscape supplier will not deliver less than 1 cubic yard of any given material.  Second, the delivery trucks only have two bays, so they can only deliver two different materials at a time.  Since we were already having gravel and soil amendment delivered, it would have been an additional delivery (at $50 a pop) and we would have had to buy twice as much as we needed.  No thanks.

The gentleman I spoke with at the landscape supply place suggested that we come in and bag some cobble stones ourselves.  That way, we would not incur extra delivery costs or have a ton left over.  Plus we would be able to avoid broken stones, and actually pick out the nice looking stones.  So we did.

I wish I had brought my camera, but maybe a description of the place would suffice.  Essentially, there are many bays created by cinder block walls, each one filled with a different material, gravel, rocks, barks, sand, dirt, you name it, they have it.  We backed my car right into the bay filled with large cobblestones, put our bags in the back seat, and started filling them up, stone by stone.  We were warned to put the bags in the car and then fill them, because there is no lifting those things once they are full.  I would also suggest bringing gloves.  I don’t know what we were thinking not bringing any, since we use work gloves for practically everything.  They certainly would have come in handy.  Also, sensible shoes.  Climbing all over a giant pile of cobble stones in flip flops was probably not the smartest thing I’ve ever done, and I’m lucky I didn’t smash any toes.

After a few other errands, we did finally get to work on the yard, but we only got about half way through what I thought we could accomplish this weekend.  We mixed the soil amendment into the lower part of the yard and lines one side of the path.  I think it looks pretty good; we just need to finish the other half and get some plantings in there.  I don’t see anything happening until next weekend though, and I can imagine our neighbors complaining any minute now about the pile of soil amendment still in our driveway.


© 2011 The Beehive All Rights Reserved

Bonus Path Post!

I really didn’t think we’d have much to add right away on the path progress, but it looks like things are moving right along!

I had two cubic yards of bird’s eye gravel delivered yesterday morning.

It was hard to watch the delivery guy dump a huge pile of gravel on the driveway because, as you may recall, we already have another huge pile of rocks that used to be in the front yard that we are trying to get rid of, slowly but surely.

Anyway, I thought I might surprise Steve by having the whole path filled in when he got home from work.  I got started first by laying the weed block down on the path area.  This was a little bit tougher than I thought.  Because the path is all curvy, I had to cut the weed block into many pieces to make it fit, rather than just rolling it out as I would have been able to do if the path was just a straight line.  This meant I needed a lot more cramp-ons (giant staples you hammer into the ground to hold down the cloth).  It also took a lot more weed block than I originally calculated because you have to overlap by several inches at each joint, and I had not considered that the curve would require so many joints.  So, that meant a trip to Home Depot.  And, because I’m conscientious about time and gas, I packed in a few more errands while I was out, which meant I didn’t really even get to working on this until after 6PM.

Okay, back to the actual path construction.  I ended up with two rolls of weed block, 3 feet wide by 50 feet long, and 40 cramp-ons altogether.  Since the path is 4 feet wide, I cut the weed block in pieces 52 inches long, so there would be a couple of extra inches on each side of the path.  Then I just started laying them down, overlapping by at least 2 inches, and often more to accommodate the curve.  This is what it looked like when I was done:

Then came the “easy” part.  I just started loading up the wheelbarrow with gravel and dumping it over the weed block.  When I say “easy,” I mean easy once you get the hang of it.  Also, “easy” in the sense that’s it’s not rocket science, as opposed to it not being tiring and tedious work.

I learned a couple of things.  One is not to overfill the wheelbarrow.  Just because there is physically more room in the wheelbarrow does not mean you will be able to control it.  In fact, you will likely end up tipping it over accidentally and dumping gravel exactly where you don’t want it.  Two is to dump the gravel in from the lower side of the slope, rather than the upper.  It’s a little easier to empty from the upper side, but again, harder to control, and if you lose control you’ll end up crushing the bender board edging, requiring emergency repairs.  Steve helped with both of these situations when he got home.

Last night I think I got maybe a third of the way done.

I started back at it this morning and finished shortly after 1pm.

Of course, it’s not quite finished.  I did tamp it down some to settle the gravel a bit, but we’ll probably need to do that a bit more, and perhaps wet it while doing so.  Then we’ll fill in any sparse area with leftover gravel.  We’re also going to line the edges with cobble stones to give it a rustic look.  And of course, all the dirt around it needs leveling, and the addition of some soil amendment (you might have noticed a big pile of dirt on the driveway in some of the pictures), and of course, plants.  But reasonable progress, I think.

© 2011 The Beehive All Rights Reserved

The Path to Nowhere

Last summer, we shared a lot of work we did on a part of our front yard.  It took us weeks — maybe it was actually months — to clear our yard of ugly white landscaping rock, overgrown rosemary, and weeds.  By the time we were done, we were too tired to actually replace anything we removed with something new.  We took a little vacation from yard work, did some upkeep on other areas that we had been neglecting, and before we knew it, the bad weather was upon us.  So the space sat idle for months with nothing more than occasional weeding.


Now that it has stopped raining and the weather is actually behaving somewhat like we expect it to in June, we are back outside.  Part of our plan is to create a winding little gravel path.  We thought it would be visually interesting, provide access to the interior areas of the space, and provide a bit of a low maintenance area (no watering and easy weeding with no actual plantings).  We did the excavation of the path area recently.

We (read: I) did some research as to how to DIY a gravel path.  We (I) decided to follow the instructions in an old edition of the Sunset Western Landscaping book.  In a nutshell, it suggested excavating down about 3 inches, installing some sort of edging, adding a 1-inch layer of sand, tamping it down, then adding a 2-inch layer of your desired gravel. Pretty easy, right?

Day 1 of our project involved excavating the upper side of the path and installing our edging.  We chose 4″ redwood bender board (which is actually only 3.5″, not 4″ — where did the lumber industry learn how to measure?).  We had already marked off the area where we wanted the path to go with some landscaping stakes and string.  Actually, it was so long ago, the string was long gone.  So we just connected the dots of the stakes with a gentle curve and held the bender board in place with more of the same landscaping stakes.

The bender boards were originally 8′ long, but we found we had to cut some of them shorter because we could not get the curve we wanted and stay level with the slope without twisting the board.  We also overlapped the boards by a couple of inches at each joint to prevent dirt from seeping or gravel seeping out through the seams.

So this is what we had at the end of Day1:

We were pretty pleased.  It didn’t look bad and it didn’t really take all that long.  We were confident we’d have no problem finishing the excavation on Day 2.  Well, the second day ended up being a little bit harder than we expected.  It involved a lot more measuring because we wanted to make sure the width of the path was consistent.  Plus, in addition to just digging the sides and installing the bender board, we needed to dig out the whole middle of the path and make sure it was nice and even and level (we used a 10″ square hand tamper to help with that).

It took us pretty much all day, but we reached our goal of getting the structure of the whole path in place.  All we need to do now is order the fill materials and dump them in.

© 2011 The Beehive All Rights Reserved


Allison’s New Bib

My mom busted out her sewing machine and made this clever new bib for my niece, Allison.  She bought a tea towel with a fun stripe on it, cut a hole towards one end of it, and edged the hole with ribbing to slip over the baby’s head.

Voila, it’s a bib that provides way more coverage than a typical bib for messy feedings.

Allison looks super-cute in it too.  Of course, she’s always cute.

© 2010 The Beehive All Rights Reserved
Dining In

My latest project is painting the dining room.  I’m probably about 2/3 done at this point.  Here is what it looked like before.

And I’ve also added a little fall flair.

Assuming I don’t get side tracked, the afters should be coming in the next couple of days.  And I have learned my lesson about putting the old curtains back up, so don’t expect to see those again.

© 2009 The Beehive All Rights Reserved

The Times They Are A-Changin’

DISCLAIMER: I am not pregnant.

I browse craigslist from time to time to see if there may be some diamond in the rough piece of furniture we might want or need for our house.  Last week, I found a great buffet/sideboard in a dark wood that matches our dining room table and chairs for a song.  The woman selling it was also trying to unload a changing table.  Solid wood, only $40!  Needed a bit of wood glue to repair the drawer front, but I decided to take it.

Did I mention I am not pregnant?

We do have a five-month-old niece, though.  And I hope she comes to visit more often.  And now that we have a changing table just for her, there really is no excuse for her not to be visiting. 

In addition to needing the small drawer repair, I also wanted to put a new cover on the pad, because who knows what the prior owner did on that thing.  Most likely things involving human waste.  We don’t want those things touching Allison.  So I went to the fabric store to pick out some super-cute kiddie fabric.  Here’s how it turned out. 

I loved this bright cotton fabric with little bugs all over it.  I choose a coordinating green flannel for the other side so the baby’s butt could rest against something a little cozier in cold weather.  I sewed some hot pink bias tape into the seam as a sort of faux piping, and closed the cover with hot pink buttons. 

I think it turned out so cute, I now have the urge to design an entire kids room around it. 

And by the way, I am not pregnant.

© 2009 The Beehive All Rights Reserved
Mastering the Master Bedroom

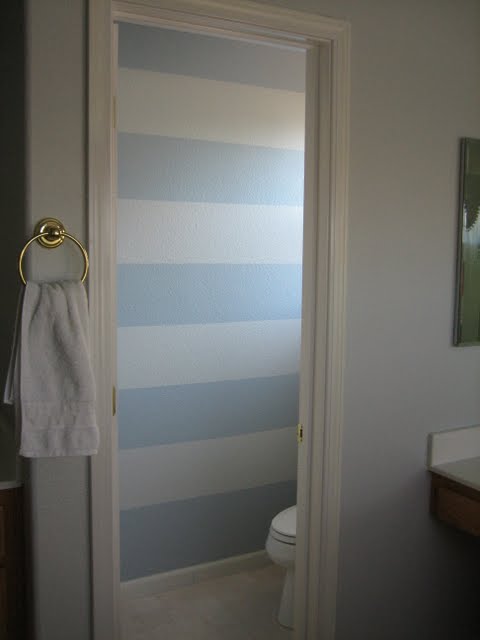
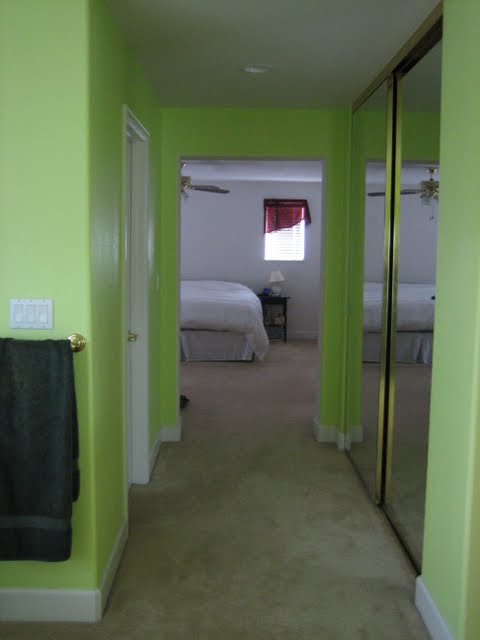
After three days of painting, I finally finished the master bedroom.  I carried the colors from the master bathroom into the bedroom, with Behr’s Silver Tradition on the walls and Soft Denim on the ceiling.  When it came to the bathroom, I differentiated the the small water closet from the bathroom as a whole by adding some horizontal stripes (check them out in this post).  I wanted to similarly differentiate the bedroom.  So here’s a peek from the bathroom.

I added an accent wall.  It’s Behr’s Provence.  Digression: I bought a quart of the stuff in an eggshell finish, which the guy at HD assured me would be enough for the one wall.  I wasn’t.  So I had to go back for a second can.  The two cans were totally different textures.  The first was watery.  It seemed strange to me because other Behr paint I have used has been pretty thick.  I assumed it was because the color was so much darker than what I have generally used, and the dark pigment affects the consistency of the paint.  The second can, however, was the thickness I was used to.  What’s the deal?  Luckily, I couldn’t tell the difference when they were applied.  So here is the rest of the room.

I’m not quite sold on the accent wall at this point.  Don’t get me wrong, I like the whole bedroom/bathroom combination much more than before.  And it’s not just getting rid of the lime green — the white walls in the bedroom had a lot of poorly-camouflaged Spackle-filled holes, and it was pretty clear the room hadn’t been painted since the house was built (a fact further evidenced by the way the walls sucked up the new paint).  But I love love love the bathroom and I really don’t feel that strongly about the bedroom.  Maybe it’s because the dark color against the light color makes it much easier to see that my edges are not perfectly straight.  Or maybe we just need to update the curtains (the new paint only serves to highlight that the ones that came with the house are Awful with a capital A) and furniture and get some art on the walls.  In any event, we’ll be living with it for a while and we’ll see how it grows on us. 

© 2009 The Beehive All Rights Reserved
Beautifying the Bathroom

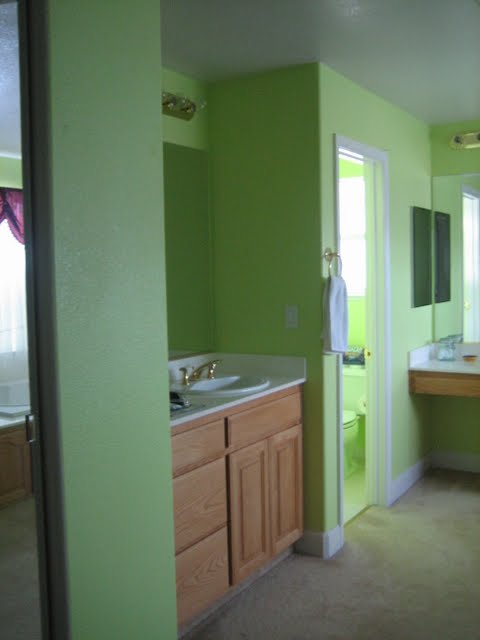
When we moved in, our master bathroom was a grotesque shade of fluorescent green. One of our friends said we just needed a black light in the room.

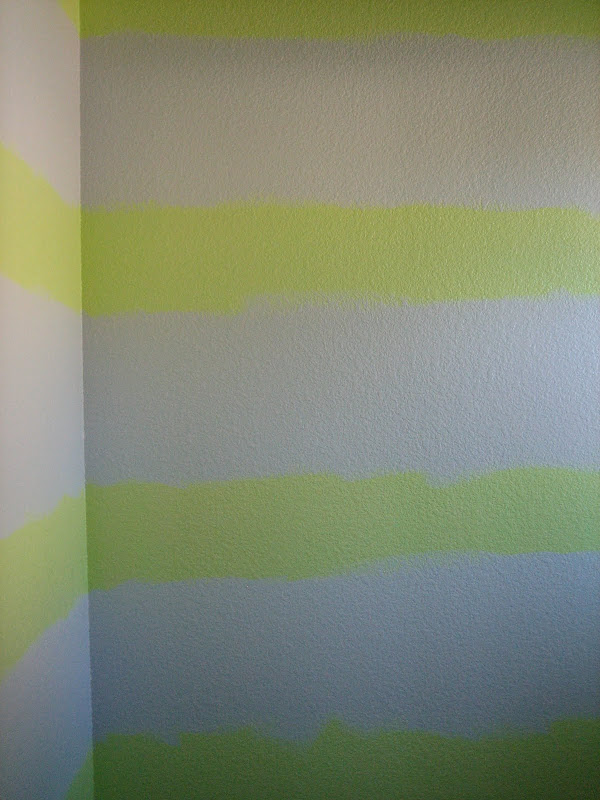
The awesome green paint ranked high on our list of things to change as soon as possible, starting with the WC. I painted it in stripes of Behr’s Silver Tradition and Soft Denim.

I carried those colors into the main bathroom, but not the striping action. The ceiling became Soft Denim and the green walls were covered with Silver Tradition.

The whiter-than-white master bedroom is still in progress, but it’s getting a makeover too. To be continued . . .

© 2009 The Beehive All Rights Reserved

Creepy Cookies

I went to the craft store last week to get balsa wood to make some faux Roman shades for our guest room.  More on that later.  I expected to do a little browsing because this particular store was new to me, but I was unprepared for the 60% off Halloween and general fall decorations that assaulted me as I walked in the door, so of course I had to walk away with a few items, including a haunted gingerbread house kit. 

I’ve been known to create a gingerbread house or two in the past:

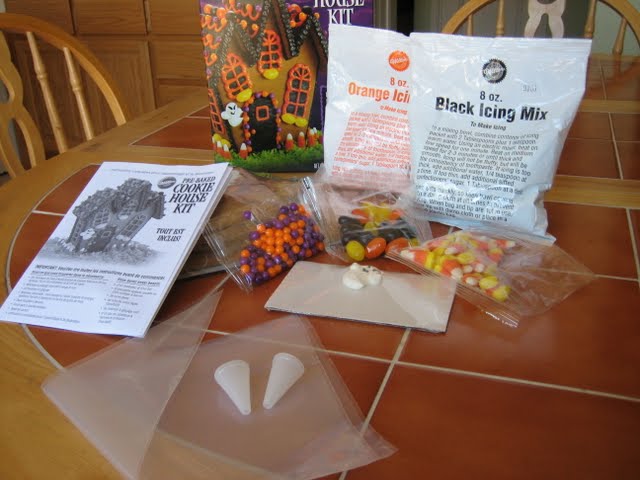
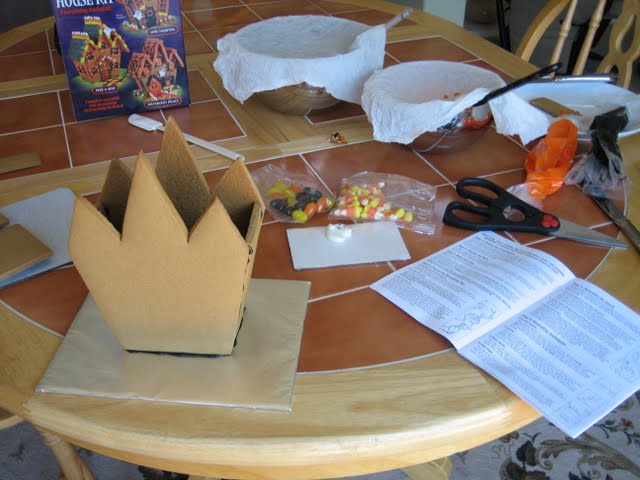
I thought the kit would be a quick little diversion without the headache of making my own gingerbread and icing, deciding what kind of candy I wanted to decorate with, etc.  This particular kit came with pre-cut cookie pieces, packets of orange and black icing mix, two piping bags with decorator tips, various candies for decorating, and directions for decorating in three alternative styles, which I promptly threw out the window when I got to the part about letting the base of the house set for an hour before proceeding. 

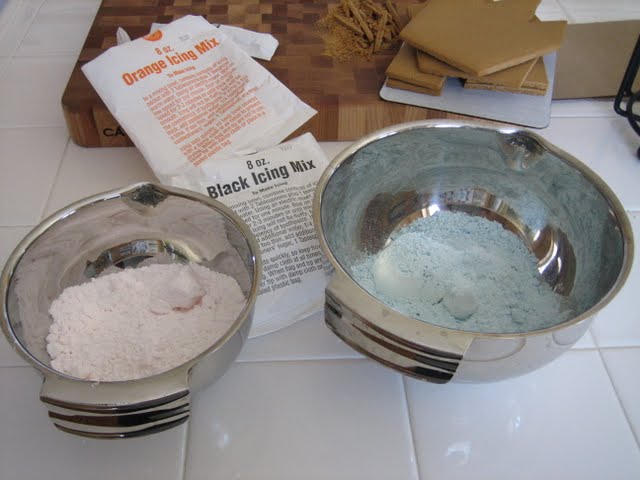
I was amazed that these two pale powders mixed up to bright orange and deep black with just a couple tablespoons of water.  I was a bit disappointed in the consistency, though.  The orange was extremely runny after  following the mixing instructions and I had no powdered sugar to add to stiffen it up.  Another reason I threw the directions out: I couldn’t do the suggested piping with such loose icing.  The instructions also suggested cutting the jellybeans in half with a sharp knife.  Have you ever tried cutting stale jellybeans in half?  I just about cut my fingers off three or four times, and I don’t recommend it. 

Despite the few minor hiccups, this is how it turned out.  Not my best work, but not bad for an hour or two with a $10 kit.

© 2009 The Beehive All Rights Reserved