Window Woes Fixed With Film

Our latest project will give you a sneak peak into part of our master bathroom.  We have a water closet separating the toilet from the shower, tub, and sink area.  The prior owner had a littled faux stained glass action going on.  But look closer.  She didn’t just apply a decorative window film, she cut the film into a mosaic-style design before applying it.  Oh, and isn’t the flourescent green paint fabulous?!?
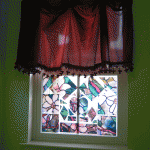
windowfilm1 windowfilm2

Needless to say, we removed the decorative film, as well as the lovely valance.  Of course, that left us with a wide open view straight into the neighbors’ house, which happens to correlate to the neighbors’ wide open view into our bathroom.  Our answer happens to be more window film, but not of the stained glass variety.  We chose a textured glass pattern that blurs the view but still lets in sunlight.
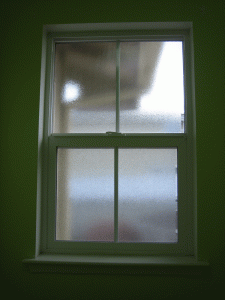
windowfilm3


The process is pretty simple and fairly inexpensive.  The roll of film cost us about $20 and it covered this window plus half of another bathroom window.  To install, measure the window and cut the film to size.  I urge you to do a better job measuring than I did (you can see a sliver of window around the edge that didn’t get covered by film).  Make sure your window is clean, and spray it with water with a few drops of liquid soap mixed in.  Peel the backing off the film and wet that down with your diluted soap/water mixture as well.  Apply it to the window and wet it down on the outside one more time.  The third round with the spray bottle is to lubricate the outside so you can smooth it out and press out any air bubbles with a squeegee (a small one was included with the film kit).  And then you’ve got what looks like a textured glass window, but for the uncovered edge.  🙁  It still does the trick as far as privacy goes, though.

2009 © The Beehive All Rights Reserved

Our Productive Weekend or House Tour Part 1: The Family Room

I’m totally amazed by the amount we got done around the house this weekend.  First, Steve made some amazing progress with the weeds in the back yard.  I didn’t take any before and after pictures because I didn’t expect him to be outside too long, or to make too much of a dent in our forest of weeds.  Boy was I wrong!  He cleared a huge area along the back fence and around the patio, and the yard is actually starting to look, well, pretty.  I also did a fair amount of weeding myself, and got started with a little painting project. 

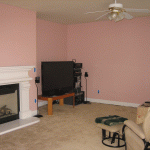
This is our family room.  It sits just off the kitchen, and because we’re getting started with its make-over, it will be the first room on our house tour (although logically a bit out of order).  We’re tackling the family room first because: (1) the family room and the kitchen are probably the two most used rooms in the house, so we want them to be comfortable places that we really enjoy being in; and (2) it’s pink. Really, really pink. And the seller left us some fabulous curtains.

beforefamilyroom1 beforefamilyroom2 beforefamilyroom3

We’ve got a whole plan for the family room here.  This weekend, I started by painting the ceiling.  Of course this involved a bit of prep work first.  I removed all of the curtains and hardware, removed and/or taped off the light fixtures, and laid out drop clothes before slathering a coat of paint on the ceiling. 

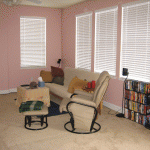
afterfamilyroom2 Afterfamilyroom1

Just taking down the curtains made a huge difference and really lightened things up.  I started with just the ceiling because we’re taking baby steps on the painting; neither one of us wants to spend a whole weekend painting, so we’re doing it one wall at a time. 

2009 © The Beehive All Rights Reserved

One Tomato Two


We neglected our two tomatoes and burpless cucumber a little bit too long.  Although they get regular water, they were getting too big for their little plastic containers, so we found a spot for them and put them in the ground.
 
Those seedlings are getting a little too big for those plastic pots!

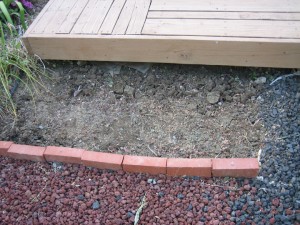
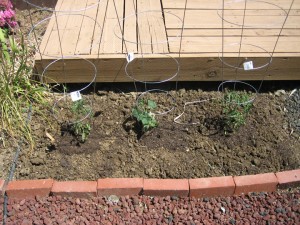
There just happened to be a little patch of earth next to our lower deck that had nothing but weeds in it.  I cleared ’em out.  I turned the dirt over and mixed in some rich potting soil and in went the seedlings.  Looks pretty good, no?

Before
Before


After
After

Hopefully this will turn out to be a good spot and they will thrive. 

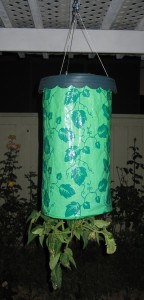
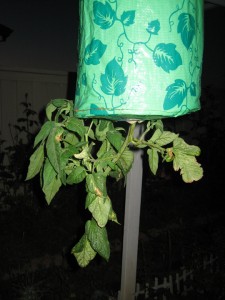
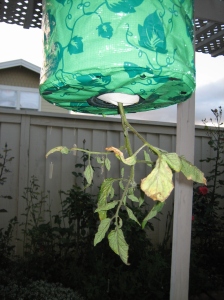
Of course I always check on the topsy-turvy when I’m outside.

topsyturvy3topsyturvy4


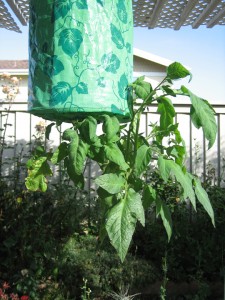
I’m pretty surprised that the main stem is twisting up, rather than growing down as it seems to be in all the example pictures.  There are a number of blossoms on it, though.  Hopefully we will get lots of tomatoes.

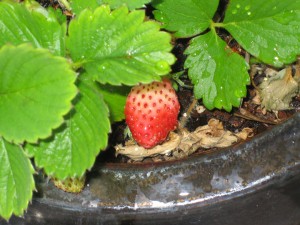
The strawberries are ripening too!

redstrawberry


2009 © The Beehive All Rights Reserved

Summer Days

topsyturvy1

topsyturvy2I think it’s so strange to arrive home at, say 7:30 and still have plenty of daylight, but it’s a great opportunity to get out in the yard (and weed, what else?), something that would normally have to wait for the weekend.  I like keeping an eye on plants as they grow.  In this case it’s pretty much limited to the few veggies Mrs. B gave us, since virtually everything else was here when we moved in, and not of our choosing.  So I tend the topsy turvey, the tomato seedlings, cucumber, and strawberry pot when I get home.

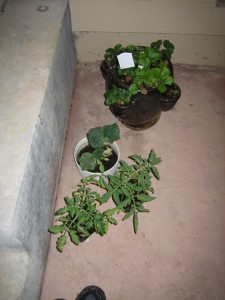
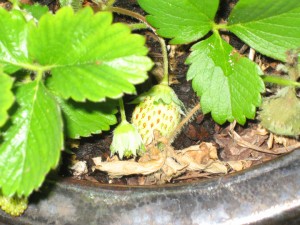
It’s hard to see when you look at them every day, but when I look back at the pictures I took when I first planted, there has definitely been some growth.  There are actually tiny green strawberries on the strawberry plants! 

porchplantsgreenstrawberry1


2009 © The Beehive All Rights Reserved

The Hat Rack is Operational

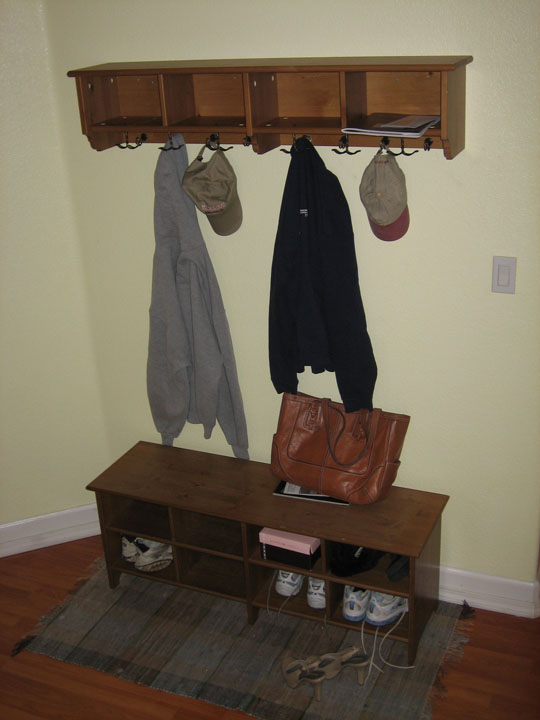
I went to HD yesterday and bought some 2 inch wood screws to secure our hat rack into the studs.  I thought it would be pretty simple to replace the 1.5 inch screws one at a time.  Not so much!  The thing pulled out of the wall while I was replacing screw number 1.  With Steve’s help, we got it back in to place and got all three screws secured into the studs and the rack is now ready to accommodate hats, sweatshirts, etc.  Sweet!

It can hold up hats (and other things)!

2009 © The Beehive All Rights Reserved
Operation Hang Your Hat

Flat surfaces in a house tend to be problematic because they collect stuff.  Every day, when we get home from work, a pile of mail, a purse, and messenger bag gets dropped on the kitchen table.  Often some shoes end up underneath it as well.  We needed a spot for this stuff to keep it from cluttering up the living area.  Enter the entryway.  We have a pretty large entryway with a big blank wall pretty much equidistant from the front door, where most visitors enter, and the garage door, where we usually come in from the car.

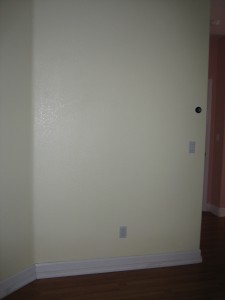
Our blank wall.
Our blank wall.

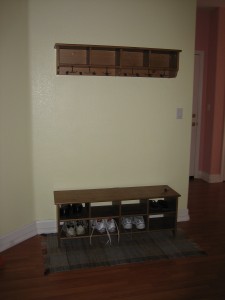
We added a shoe rack that I got from Ikea years ago.  I’ve never actually used it as a shoe rack before.  In fact, it’s been a TV stand for most of it’s life, with baskets in the compartments holding stuff.  Ikea also happens to have a matching hat rack, so I picked that up and assembled it, and up on the wall it went.  Here’s the finished product:

Our new mud area.
Our new mud area.

We thought it would be a pretty simple task.  My dad (and my mom, and my brother) was even here and he helped us out with it.  The pre-drilled holes, however, were not spaced at 16 inch intervals like the studs, so we had to drill some new holes.  One that was done, we drilled the holes in the wall and unfortunately were off by about and inch so we didn’t hit the studs.  Measure twice, cut/drill once, people!  Anyway, after some trial and error, it made it up there.

I bet you are wondering why there are no purses, coats, etc. hanging on it to dress it up.  Well, we only had 1.5 inch screws, and as it turns out, that’s not long enough to get into the studs.  Oops!  So although it’s up and it looks nice, until we can get to HD and get some 2 inch screws, it’s not strong enough to hold anything and it will remain bare.  Sigh!  Hopefully we will be better prepared next time we tackle a project.

2009 © The Beehive All Rights Reserved
How Does Your Garden Grow?

Steve’s mom, “Mrs. B,” is a pretty avid gardener.  She has raised beds in the backyard with all kinds of different vegetables, –multiple varieties of tomatoes, cucumbers, lettuces, squash, fennel, I don’t even know what else.  She starts them all from seed, and actually ends up giving quite a few away to friends and family, as well as donating some to a local charity to sell.  I usually get a few different tomatoes and a cucumber, which I’ve grown in my parents’ garden the past few years.  This year, Steve and I have our own yard to plant them in! 

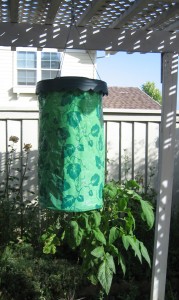
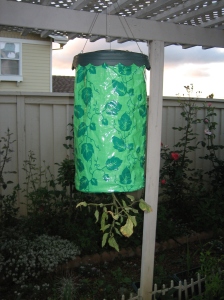
The catch: the former owner had some interesting landscaping ideas.  Both the front and back yard are filled with rose bushes (with a few other types of flowers scattered here and there), and what is not occupied by roses is covered with decorative gravel.  In other words, there is nowhere to plant anything without tearing something else out.  Which we fully intend to do . . . when we have some free time.  For now, though, one of the tomatoes, an heirloom brandywine, was in pretty serious need of repotting, so we grabbed a “Topsy-Turvey” on impulse at Fry’s and hung the brandywine upside down from the trellis in the backyard.

Our new Topsy-Turvey . . .
. . . and the brandywine we planted.

 I’m really curious to see how this thing works.  The last time I tried a novel gardening gimmick was a complete disaster.  It was a raised bed with a special soil mix.  Because you start with weed-free soil mix, you were supposed to have no weed problems.  Further, the mix was “friable,” so if you over watered it was supposed to flow right through and not hurt your plants.  It was supposed to be idiot-proof, but everything died within a couple of weeks.  Notably, the items I planted straight into the hard clay soil next to the raised bed flourished. 

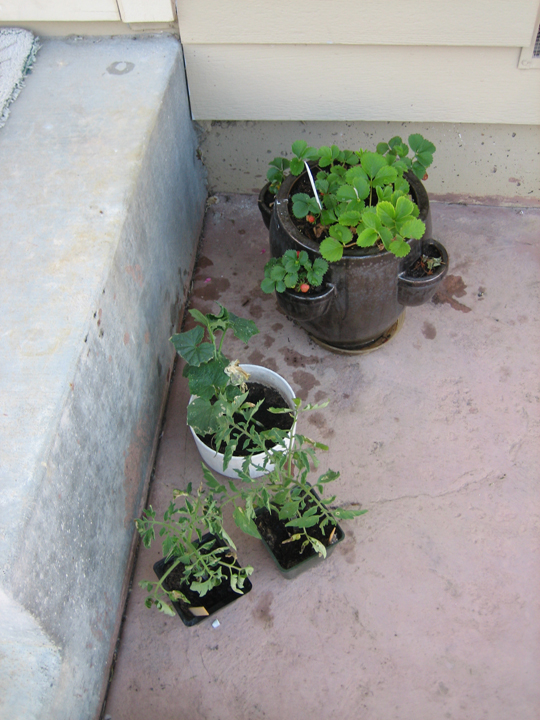
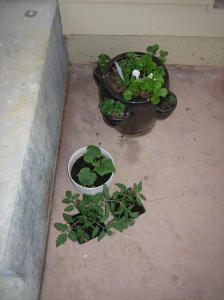
We still have to figure out what to do with the additional plants Mrs. B gave us, a Burbank slicing tomato, and orange cherry tomato, and a burpless cucumber.  They don’t look like they are outgrowing their pots just yet, so we have a little time.  She also gave us some strawberries in a strawberry pot, which of course won’t need to be transplanted.  I hope we do well with the plants this summer; it would be fun to have some super fresh fruits and veggies straight from our garden.

Two tomato seedlings, a cucumber plant, and a strawberry pot.

© 2009 The Beehive All Rights Reserved
Operation No More Dishpan Hands

Last night, our dinner dishes washed themselves while we kicked back and watched “Mythbusters” on DVR.   Yup, we actually accomplished a task on our to do list by replacing our dishwasher drain hose.  Here’s what we did:
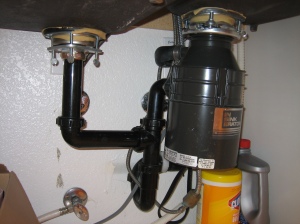
Under the sink, before.

We actually did not have to replace the entire drain hose, which made this project much easier than anticipated.  The only problematic hose was the connection between the “air gap” and the garbage disposal. 

For those of you not blessed with an air gap, in some areas, building codes require that a dishwasher not drain directly into the disposal.  Rather, the drain connects to a vent in the top of the sink (the “air gap”).  A second hose goes from the air gap to the disposal.  You can see in this picture the hose connecting the air gap to the disposal is a bit kinked.  It’s not entirely closed off, but you can see that it is bent at too far of an angle, narrowing the passage of water.  As a result, when the dishwasher drained, excess water that couldn’t make it through the small space leaked out the air gap.
 

You can see the hose flattens out where it bends, allowing less water through.
It’s pretty simple, really.  First, you loosen the bolts on the hose clamps, the little metal strips wrapped around the ends of the tubing that hold it to the connections on the disposal and the air gap.
Here is S trying to get the hose off the disposal connection after loosening the hose clamp.
Once you’ve loosened the clamps and removed the hose, you just reverse the process with the new hose.  Remember to check the size of your existing hose before you go to the hardware store to buy a new one.  We forgot on our first trip.  Our hose has a 7/8 in. internal diameter.  Most of what they had at Home Depot was 3/4 or 1 in. , so we had to get some hose specially cut.  We purchased about 4 feet of hose, just to be safe. 
 
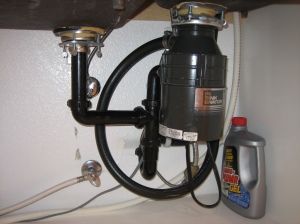
Place the hose on the connections at the air gap and disposal, and tighten the hose clamps.  Viola!  You are done.   Here’s our new, extra long hose:
Under the sink, after.
It looks funny, but we couldn’t find any other way to connect the air gap and the disposal without creating a kink in the hose, just like we had before. 
 
This post is for informational and entertainment purposes only, and is not intended to be advice.  Please consult a professional.  Also, before doing any home improvement projects yourself, remember to take all appropriate safety precautions (for example, but not limited to, turning off electricity or water, etc.). 

© 2009 The Beehive All Rights Reserved
The “To Do” List

When we were in contract on The House, we hired an independent home inspector to check things out and give us a report on its condition.  You know, so we wouldn’t end up like Shelly Long and Tom Hanks in “The Money Pit.”  For the most part, The House got a clean bill of health, but there were a few minor issues that needed to be dealt with in the short term.  They are:

  1. Dishwasher Drain Hose: The existing hose is too short and as a result gets a kink in it where it bends under the sink.  As a result, the DW does not drain properly and water runs out the vent in the sink.  We need to replace the hose with a longer one.  Relatedly, the faucet requires some new caulking around it.  We’ve noticed that when water runs out the vent, it leaks through the gap between the faucet and sink and to the cupboard underneath. 
  2. Gutter Drain:  The drain near the garage door does not reach all the way to the ground.  As a result, when it rains, water pouring out the drain can leak into the foundation area.  We need to put an extension on the drain so it will flow down the driveway and not into the foundation.
  3. Upstairs Bathtub: On of the upstairs bathtubs requires new caulking, and a tightening up of the faucet.  As it is, water could be leaking through underneath the tub. 

We hope to tackle the dishwasher hose this evening.  We had no dishwasher at our old apartment, and were so looking forward to not doing all the dishes by hand, but because of the drainage problem we are still handwashing everything!  So this is a top priority.  Stay tuned for the results.

In other news, we previously wrote about packing up for the move, but have yet to finish the story with unloading into the new space.  Hopefully we’ll have that post ready soon.  Also, we’ll get to a room-by-room as soon as things are unpacked enough that the place is presentable.

© 2009 The Beehive All Rights Reserved