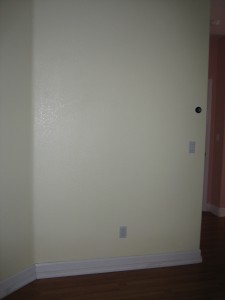
Flat surfaces in a house tend to be problematic because they collect stuff. Every day, when we get home from work, a pile of mail, a purse, and messenger bag gets dropped on the kitchen table. Often some shoes end up underneath it as well. We needed a spot for this stuff to keep it from cluttering up the living area. Enter the entryway. We have a pretty large entryway with a big blank wall pretty much equidistant from the front door, where most visitors enter, and the garage door, where we usually come in from the car.

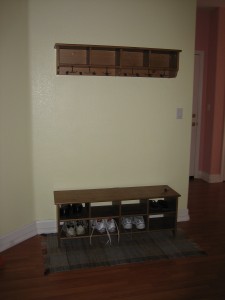
We added a shoe rack that I got from Ikea years ago. I’ve never actually used it as a shoe rack before. In fact, it’s been a TV stand for most of it’s life, with baskets in the compartments holding stuff. Ikea also happens to have a matching hat rack, so I picked that up and assembled it, and up on the wall it went. Here’s the finished product:

We thought it would be a pretty simple task. My dad (and my mom, and my brother) was even here and he helped us out with it. The pre-drilled holes, however, were not spaced at 16 inch intervals like the studs, so we had to drill some new holes. One that was done, we drilled the holes in the wall and unfortunately were off by about and inch so we didn’t hit the studs. Measure twice, cut/drill once, people! Anyway, after some trial and error, it made it up there.
I bet you are wondering why there are no purses, coats, etc. hanging on it to dress it up. Well, we only had 1.5 inch screws, and as it turns out, that’s not long enough to get into the studs. Oops! So although it’s up and it looks nice, until we can get to HD and get some 2 inch screws, it’s not strong enough to hold anything and it will remain bare. Sigh! Hopefully we will be better prepared next time we tackle a project.
2009 © The Beehive All Rights Reserved

You can’t just measure and drill… The studs aren’t an accurate 16″ apart. You need a stud finder (cheap at home depot) with the wire detection feature on it. The stud finder only works when you hold it vertical (caused me to wonder why I was missing studs early on). The wire feature helps you to not drill through wires with your screw. It’s unlikely, but my friend started his house on fire last year. Normally that can’t happen… There were 2 major code violations that contributed to the fire, but hey, better safe than sorry. Also, you can usually tell where the wires run by looking at your light switches and outlets (in rooms on both sides of the wall) to help you track wires with the stud finder.
Your drywall is 1/2-5/8″ thick and the stud is right behind it. 1 1/2 inch screws should have done it, but I would have used 2″ at least.
Also,use 50lb wall anchors if you can’t reach a stud.
Thanks for the advice, Phil. We actually did use a stud finder (from Home Depot!), as well as a nifty little laser level to make sure the shelf was perpendicular with the floor. Next time we’ll just have to be a little bit more careful before we start drilling.