
I really didn’t think we’d have much to add right away on the path progress, but it looks like things are moving right along!
I had two cubic yards of bird’s eye gravel delivered yesterday morning.

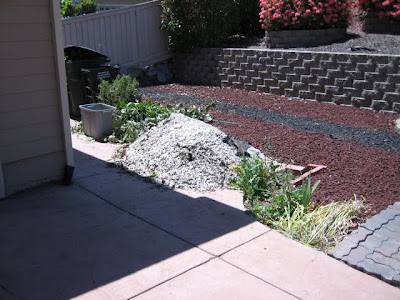
It was hard to watch the delivery guy dump a huge pile of gravel on the driveway because, as you may recall, we already have another huge pile of rocks that used to be in the front yard that we are trying to get rid of, slowly but surely.
Anyway, I thought I might surprise Steve by having the whole path filled in when he got home from work. I got started first by laying the weed block down on the path area. This was a little bit tougher than I thought. Because the path is all curvy, I had to cut the weed block into many pieces to make it fit, rather than just rolling it out as I would have been able to do if the path was just a straight line. This meant I needed a lot more cramp-ons (giant staples you hammer into the ground to hold down the cloth). It also took a lot more weed block than I originally calculated because you have to overlap by several inches at each joint, and I had not considered that the curve would require so many joints. So, that meant a trip to Home Depot. And, because I’m conscientious about time and gas, I packed in a few more errands while I was out, which meant I didn’t really even get to working on this until after 6PM.
Okay, back to the actual path construction. I ended up with two rolls of weed block, 3 feet wide by 50 feet long, and 40 cramp-ons altogether. Since the path is 4 feet wide, I cut the weed block in pieces 52 inches long, so there would be a couple of extra inches on each side of the path. Then I just started laying them down, overlapping by at least 2 inches, and often more to accommodate the curve. This is what it looked like when I was done:

Then came the “easy” part. I just started loading up the wheelbarrow with gravel and dumping it over the weed block. When I say “easy,” I mean easy once you get the hang of it. Also, “easy” in the sense that’s it’s not rocket science, as opposed to it not being tiring and tedious work.
I learned a couple of things. One is not to overfill the wheelbarrow. Just because there is physically more room in the wheelbarrow does not mean you will be able to control it. In fact, you will likely end up tipping it over accidentally and dumping gravel exactly where you don’t want it. Two is to dump the gravel in from the lower side of the slope, rather than the upper. It’s a little easier to empty from the upper side, but again, harder to control, and if you lose control you’ll end up crushing the bender board edging, requiring emergency repairs. Steve helped with both of these situations when he got home.
Last night I think I got maybe a third of the way done.

I started back at it this morning and finished shortly after 1pm.
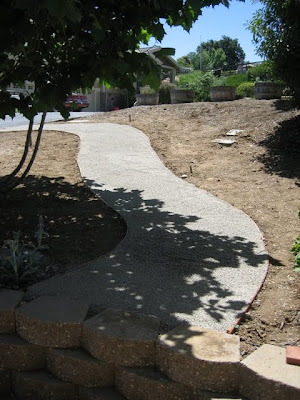

Of course, it’s not quite finished. I did tamp it down some to settle the gravel a bit, but we’ll probably need to do that a bit more, and perhaps wet it while doing so. Then we’ll fill in any sparse area with leftover gravel. We’re also going to line the edges with cobble stones to give it a rustic look. And of course, all the dirt around it needs leveling, and the addition of some soil amendment (you might have noticed a big pile of dirt on the driveway in some of the pictures), and of course, plants. But reasonable progress, I think.
© 2011 The Beehive All Rights Reserved