An Orange for All Seasons

Normally, I don’t mind cold, rainy weather.  I think it’s wearing on me a bit now, seeing as it is June.  Mother Nature did cooperate a bit over the long Memorial Day weekend, and we took the opportunity to do something in the yard besides keep the weeds at bay.  We planted a couple of citrus trees in the back yard.

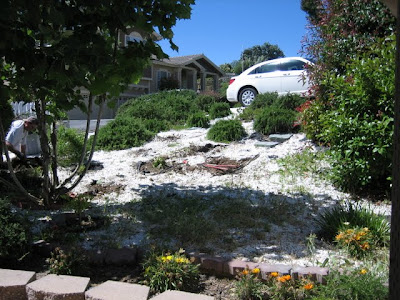
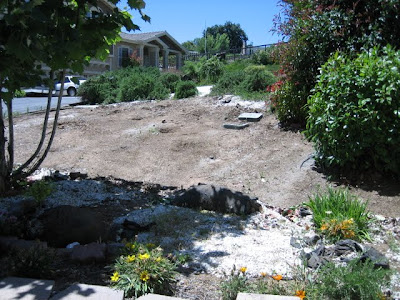
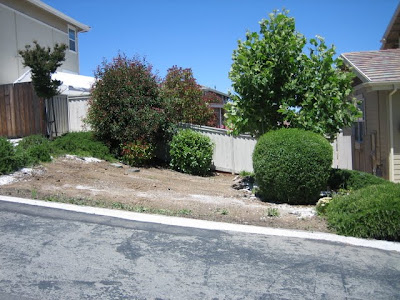
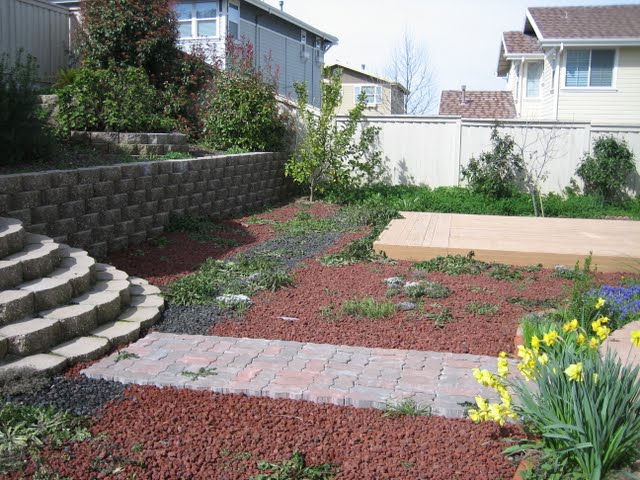
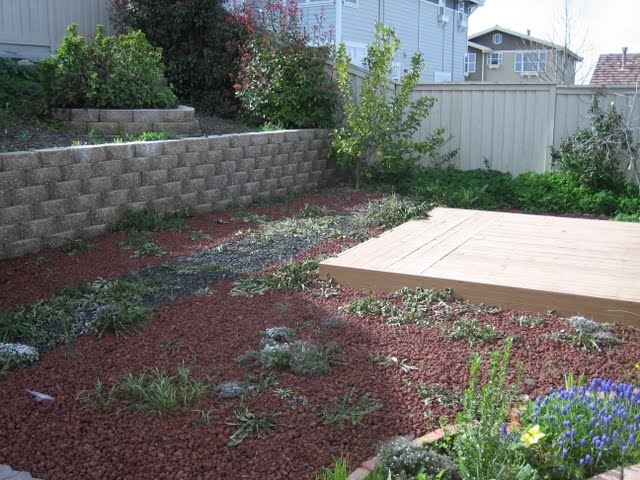
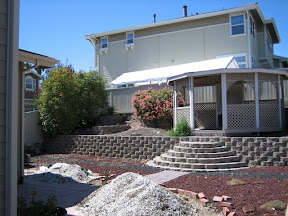
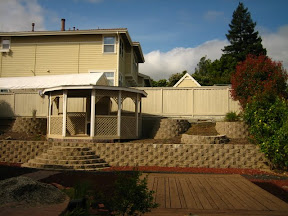
Our property is sort of on a hillside, so on the west side of the yard, there is a retaining wall and a little hillside.  There are also a few semicircular planters.  When we moved in, they were filled with geraniums.  I don’t have a problem with the way geraniums look, but I cannot stand the way they smell.  I hated trimming them because of the smell, so they got really out of control.  Needless to say, we wanted to remove them.

So we did remove them.  And those planters have been sitting empty since last summer.

We always intended to put a few citrus trees in, but based on our research, the best time to plant citrus is April.  Well, April came and went, and May almost did too.  Thankfully, local garden centers seemed to have plenty of healthy-looking citrus trees the size we were looking for, so we figured we probably weren’t too late to give it a shot.

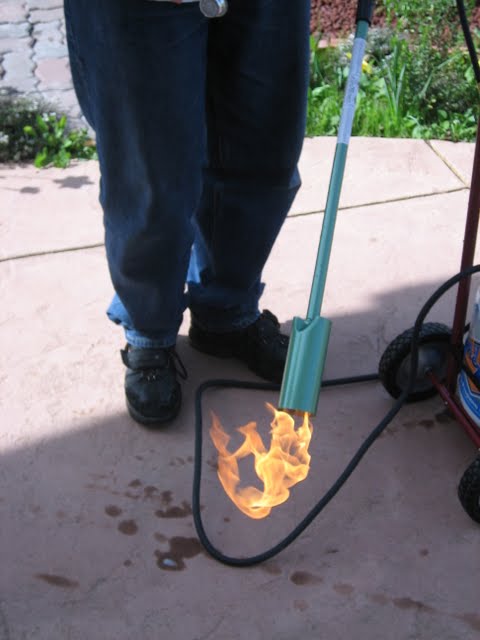
Before we started any digging or planting, we made a couple of watering stakes.  We wanted to use watering stakes to encourage the roots to grow down, rather than out.  But for a piece of plastic with holes in it, we figured we could make it ourselves for less than buying a ready-made one (note: the one in the link was actually more expensive at the brick-and-mortar Home Depot).  So we bought a 10-foot piece of 1.5″ PVC and cut it into three pieces.  So each finished stake would be just a bit longer than a yard.

Next we drilled staggered holes on 3-inch intervals with a 3/8″ drill bit.  On the bottom third of each stake, we used a smaller bit, probably about 3/16″, to drill additional holes at regular intervals between the large holes.  We finished it off by gluing a cap to the bottom and adding a removable cap to the top (it will keep out dirt and debris, but we can remove it to water).  We made three stakes for roughly the price of one at the store.

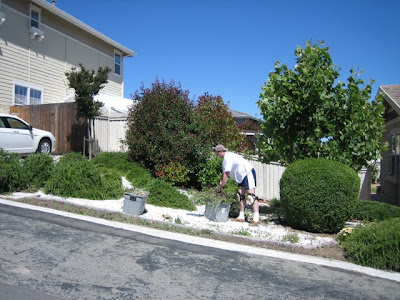
Once the stakes were ready, it was time to start digging.  We dug holes about twice the size of the container, and also used a post hole digger to add a deep, narrow hole for the watering stake.  I don’t have pictures of this because I was busy, and my hands were muddy.  But if you’ve seen one hole, you’ve seen them all, right?

We mixed the soil we removed from each hole with some amended garden soil in a proportion of 50-50.  We also mixed in some controlled release fertilizer (we used Vigoro Citrus and Avocado Plant Food, following the package directions to determine the proper amount).  We placed the watering stake and the root ball in their respective holes, and filled in the cavity with our soil mix.  Finally, we watered, created a watering trough ring around each tree, and covered the area around the base with bark mulch.

Both the trees we planted were oranges, but we chose two different varieties so that (once the trees mature enough to start producing) we would have fresh oranges for a longer period of time.  One tree is a Washington Navel, which ripens from winter through early spring, and the other is a late harvest Valencia, which ripens in early spring to summer.  Assuming these trees do well, we should have fresh oranges from our own trees for more than half the year.

© 2011 The Beehive All Rights Reserved

Yard Work

This weekend was a hot one in our neck of the woods. That didn’t stop us from getting outside and doing some work in our front yard, though. We’ve been unhappy with the look of it since we moved in, and our neighbors are not too thrilled with the white landscaping rock the prior owner was so fond of. Here’s a look at the area we’ve decided to tackle first just as we were starting on Saturday morning.

On Saturday, we pulled out all the “volunteer” rosemary. Rosemary bushes were planted around the edge of the yard area, but they self-seeded and created little mini-bushes — and some not so mini — all over the center of the yard. The weather was great and a strong breeze kept us cool while we worked.

Sunday, we cleared a bunch of the offensive white landscaping rock from the part of the yard we cleared of rosemary the previous day. This was a real chore. I don’t think we ever came up with a really efficient way to do it. We tried rolling up the weed barrier with the rocks in it, but they spilled out the edges. Further, the prior owner didn’t use conventional weed barrier for the entire yard; in some places, flattened out bags from mulch or potting soil were used, and we even found Home Depot shopping bags in some places. We also tried using the weed barrier to move the rocks into piles, which we then shoveled into buckets, but that seemed to take a long time as well.  And, we were left with this nifty pile to deal with when we were done.

So here’s what our neighbors have to look at now, until we get back to it next weekend. Probably won’t get any better, since we’ll just be pulling out the mature rosemary and removing still more rocks. But we’ve got plans, and it will eventually come together, slowly but surely.

© 2010 The Beehive All Rights Reserved

Playing With Fire

Steve and I have had our fair share of problems with weeds in our yard since we moved into our home last April.  Our neighbors were not too pleased with our brand of yard maintenance, and weren’t shy about letting us know (in an anonymous letter).  And while we tried to convince ourselves that it really wasn’t that bad, we did find some pretty hideous weeds

Last year, we finished the task of clearing the major weeds from the yard, and swore we would never let it get like that again.  The idea was we would nip the weeds in the bud, so to speak, and with some frequent low level maintenance, they would never get out of control.  With the recent rains, that hasn’t been too easy.  Our busy schedules limit the time we can spend in the yard, and there haven’t been any weekends recently that weren’t too wet, cold, and yucky to go out and work in the yard.  As a result, the weeds have grown like, well, weeds.  So we find ourselves right back where we started.

Enter the Weed Dragon weed torch. 

The best way to describe it is a mini-flamethrower.  Powered by a standard gas grill-type propane tank, it subjects the weeds to super-high temperatures, bursting the cell walls and killing the weed.  The Weed Dragon consists of the aforementioned propane tank, a handy dolly to transport the tank, and the hose and torch itself.  We also chose to purchase an optional trigger valve. 

The standard weed torch emits a constant flame which can only be controlled by adjusting the flow of propane into the torch.  With the trigger valve, you do still always have a small pilot flame in the torch, but it won’t be shooting out the big flames until you pull the trigger.  We thought this would give us more control and make using the torch safer overall. 

There is one additional essential piece of equipment:

In addition to having the fire extinguisher nearby, we decided that weed torching would always be a two person job, one manning the torch and one with a garden hose to wet down any dry looking areas before torching them and to spritz out anything that did catch fire or smolder after being torched.

Since Sunday was nice and sunny, we were finally able to take the Weed Dragon for a spin.  First, Steve tested it to make sure there were no propane leaks by pouring soapy water over all the connections and watching for bubbles for a few minutes.  When he was satisfied there were no bubbles, he rinsed it off and we lit it up. 

It didn’t take long for us to recognize that just a few seconds of heat from the torch was enough to kill most weeds.  When they wilted and turned bright green, like vegetables do when you cook them, we knew they were toast.  Our test area was a rock-covered area in the back yard.  This is what it looked like when we were done, and then a few hours later after the dead weeds became crispy. 

Notice all the still healthy weeds in the background along the fence.  We didn’t have a chance to get to those, but we did cover a lot of area in the front yard. 

The process was certainly a lot more fun than pulling each weed out by hand.  So far, it also appears preferable to Round Up.  You get more instant gratification because the weed wilts right before your eyes instead of a few days later.  It’s also nice to know we aren’t spritzing all kinds of chemicals into the soil.  Hopefully we will continue to be pleased with it as we get to use it on more areas of the yard. 

General Sherman would be proud.

© 2010 The Beehive All Rights Reserved

This Is Why Our Neighbors Hate Us

Since being scolded by our anonymous neighbor about the disheveled state of our yard, we tried to get outside more and take care of business. And things were looking better — although I still didn’t think it was that bad to begin with. That is, until Steve approached me, beaming with pride, after pulling this gem out of the ground:

steve's-weed

Yes, that is a weed as tall as he is. 6 ft. 1 in. That’s pretty bad. Actually, that’s really, really bad. In our defense, it was in an area of the yard that is hidden by trees and shrubbery and not really visible, but still . . .

© 2009 The Beehive All Rights Reserved

Welcome to the Neighborhood!

We’ve been in the new house about three months now.  We had one brief encounter with our next door neighbors one Saturday morning when we were out weeding, but other than that, we have not met anyone in the neighborhood.  Well today we received our first real introduction to the neighborhood in the mail, and it went something like this:

Dear New Home Owners,

Perhaps as a new owner in Eagle’s View II you are unaware of the Covenants, Conditions and Restrictions mandated by this development.

Enclosed is a copy for your benefit.  Please read section 5.5, the requirement on maintaining your landscaping.  Please hire someone to assist you if you are unable to maintain it yourselves.  Our home values have diminished quite a bit already, we would appreciate it if they did not devalue any further due to neglect.

Thank you so very much for your attention to this matter.

Your neighbors of Eagle’s View II

You’ll hear no argument from me that the yard needs some attention, but there’s also no question that it is vastly improved from the state it was in when we moved in, which Steve decribed as “jungle-like.”  Both of our families have agreed that it looks much, much better.  We’ve worked really hard to get things in better shape.  Could you give us a little credit?

The thing that really bothers me, though, is that this person or persons did not even have the guts to sign the letter.  It’s totally anonymous, with no return address.  We’re your new neighbors.  If you have a problem, would it really kill you to stop by, introduce yourself, and talk about the issue?  Is an anonymous nasty-gram really the best way to welcome someone new to your street?

I remember when I was growing up I new pretty much everybody living on our street.  All the neighborhood kids used to ride bikes or play ball in the street when the weather was good, and our parents all used to bump into each other outside and chat.  For a long time we had a block party every year around the 4th of July.  I can’t imagine being friendly in that manner with someone that would send this type of anonymous letter, and since it’s not signed, it feels like they were all in on it. 

I hope nobody around here stops by to borrow a cup of sugar anytime soon.

2009 © The Beehive All Rights Reserved

Backyard Bounty


It looks like the backyard may yield a fair amount of fruits and veggies for our eating pleasure this year, and we haven’t even done much to it in terms of amending the soil, new planting, etc.

There were several fruit trees here when we moved in.  We’ve got three trees that appear to be citrus of some sort, one of them with fruit on it.  It looks like lemons, but it’s hard to tell until they either turn yellow or don’t.

lemonmacro1

There’s also a nectarine, which is one of my favorites.  It looks like it’s got a problem with some curly leave disease, so we’ll have to take care of that, but it’s still got fruit on it that I can’t wait to eat.

nectarinemacro2 nectarinemacro1

There is a persimmon as well.  Did you know that persimmons were known in ancient Greece as “fruit of the gods”?

persimonmacro2 persimonmacro1

Then there is the mystery bush.  It’s got tiny berries on it that look dark purple or black when ripened.  They may or may not be edible, but we are staying away from it for the time being.

Of course, we planted a few things ourselves.  Three tomato plants, a cucumber, and some strawberries, to be exact.  The strawberries may be done.  We previously posted pictures of the small berries, but they’ve since been eaten.  One of the tomato plants has some fruit on it, as does the cucumber.

cucumbermacro1 tomatomacro1

2009 © The Beehive All Rights Reserved

Our Productive Weekend or House Tour Part 1: The Family Room

I’m totally amazed by the amount we got done around the house this weekend.  First, Steve made some amazing progress with the weeds in the back yard.  I didn’t take any before and after pictures because I didn’t expect him to be outside too long, or to make too much of a dent in our forest of weeds.  Boy was I wrong!  He cleared a huge area along the back fence and around the patio, and the yard is actually starting to look, well, pretty.  I also did a fair amount of weeding myself, and got started with a little painting project. 

This is our family room.  It sits just off the kitchen, and because we’re getting started with its make-over, it will be the first room on our house tour (although logically a bit out of order).  We’re tackling the family room first because: (1) the family room and the kitchen are probably the two most used rooms in the house, so we want them to be comfortable places that we really enjoy being in; and (2) it’s pink. Really, really pink. And the seller left us some fabulous curtains.

beforefamilyroom1 beforefamilyroom2 beforefamilyroom3

We’ve got a whole plan for the family room here.  This weekend, I started by painting the ceiling.  Of course this involved a bit of prep work first.  I removed all of the curtains and hardware, removed and/or taped off the light fixtures, and laid out drop clothes before slathering a coat of paint on the ceiling. 

afterfamilyroom2 Afterfamilyroom1

Just taking down the curtains made a huge difference and really lightened things up.  I started with just the ceiling because we’re taking baby steps on the painting; neither one of us wants to spend a whole weekend painting, so we’re doing it one wall at a time. 

2009 © The Beehive All Rights Reserved