Citrus-Glazed Pork Chops with Green Beans and Fennel Salad

I have this folder full of recipes I’d like to try, mostly stuff torn out of magazines.  I decided I better start actually making them and either adding them to the recipe program on Steve’s computer or tossing them, because they are just taking up space.  The first pick was citrus-glazed pork chops with green beans and fennel salad.  I believe it came from the April 2010 issue of Better Homes and Gardens. 

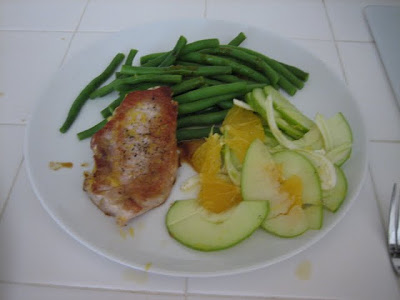
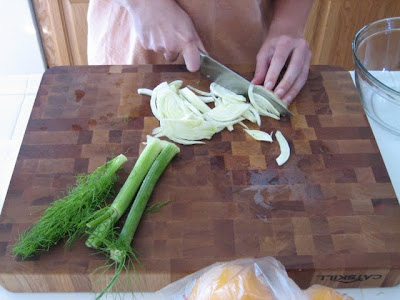
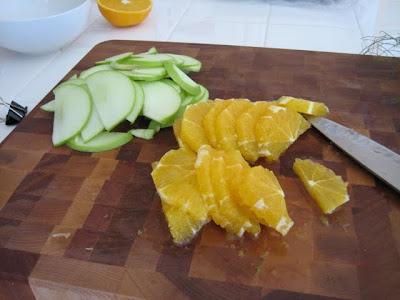
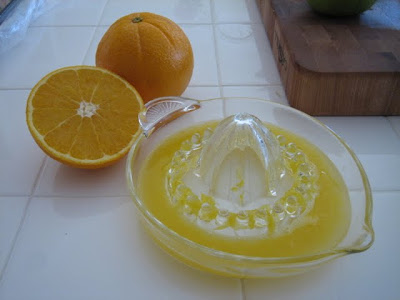
I started with the salad part because I didn’t want to be distracted by chopping while the pork chops were cooking, and also to give the flavors time to “marry” before we ate.  It consisted of 1/2 bulb of fennel, 1 apple, and 1 orange, all sliced thin.  The dressing was the juice from 1/2 a fresh orange, 1 tablespoon of honey, and 1 table spoon of olive oil, seasoned with a little salt and pepper. 

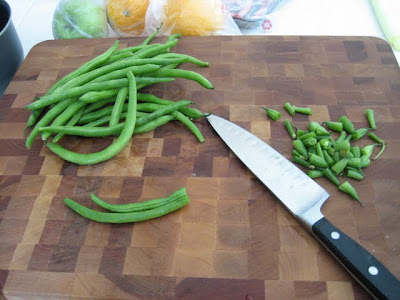
The beans were really just plain boiled/steamed green beans.  Nothing fancy there, I just cleaned them up and put them on the stove while the chops were cooking.

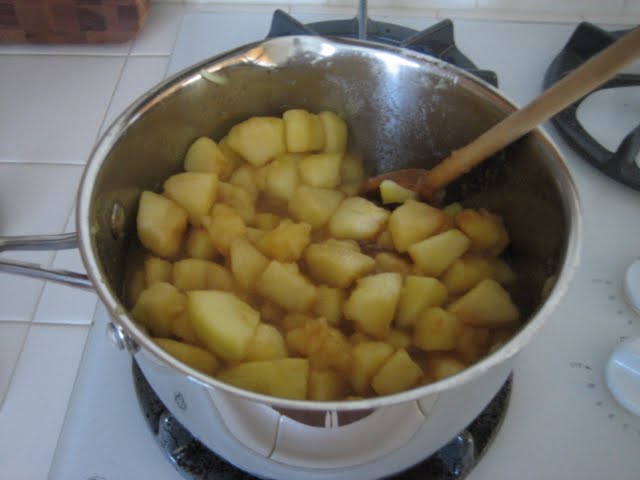
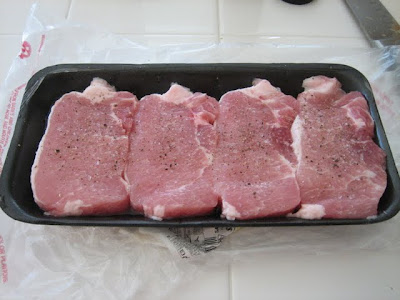
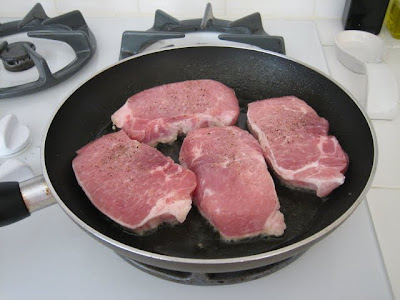
Speaking of chops, we used 4 boneless pork chops, 1/2 an inch thick.  Season with salt and pepper and cook in a pan coated with olive oil over medium-high heat for 8 minutes.  Turn them, add the juice of another 1/2 orange, and cook for another 8 minutes. 

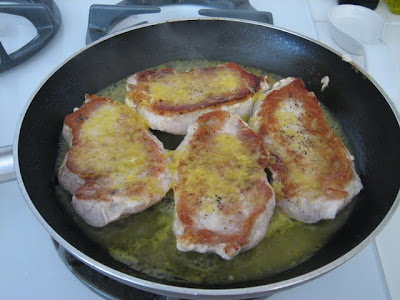
Now, the sauce created by the cooking chops and the orange juice is supposed to be poured over the green beans, but I found that by the end of the cooking, there was no sauce.  Most was burned to the bottom of the pan.  So make other plans to flavor your green beans.  I find that they are good with just a little salt and pepper. 

Despite the burned sauce, the chops themselves turned out just fine.  They weren’t too dry or tough, and they did get nice and flavorfully browned. 

As for the salad, I need to get it through my thick skull that I don’t like fennel.  The first time I had it was at a bar-b-que, and it was grilled, and I thought it was so, so good.  Since then, I’ve ordered dishes with it in restaurants, and used it myself at home, but it seems like it’s always used raw, and I just don’t like it that way.  Also, apples and oranges are not in season right now.  And the olive oil made the dressing feel heavy; I think it would have been better, and might make a good all-purpose fruit salad dressing, with just the orange juice and honey. 

So there is one mediocre dinner.  If you have any suggestions as to how this might work better, please share.  Otherwise, this one will probably go in the trash. 

© 2010 The Beehive All Rights Reserved

Apple Pie Sauce

On our last trip to Costco, we bought one of those plastic containers of Gala apples.  You know, the packs with an individual round slot for each apple that there’s just got to be something it would be useful for in the future that forces you to keep the empty container.  It seemed like a good idea at the time, because I was taking an apple to work every day in my lunch.  Not so much anymore.  The point is, these apples were past their prime and I did not want them to go to waste.  The solution?  Applesauce. 

We had 8 apples sitting in our fridge.  I peeled, cored, and chopped them into chunks.  The size of the chunks is up to you.  I remember when I was a kid, we made applesauce at one of our Brownie meetings.  We ate it warm, and it still had chunks of apple in it.  So I chose to make mine a little chunky.  Well, a lot chunky.  As I was peeling and chopping, a sprinkled a little lemon juice over the apple chunks as I added the new chunks to prevent them from turning brown before I got them on the stove. 

Once the apples were chopped and ready to go, I dumped them in a large saucepan with about a cup of water, brought the water to a boil, and let it simmer for 10 minutes or so, stirring occasionally.  The length of time you cook the apples for will depend on how big you make your chunks and how chunky you want the final sauce to be.  Bigger chunks means more cooking until they are tender.  If you want the sauce to be smooth, cook it until the chunks are very tender.  If you want chunks, they don’t have to be quite as tender. 

When the chunks were a bit short of my desired done-ness, I added about 6 tablespoons of sugar and a teaspoon of cinnamon.  I would have added a bit of nutmeg as well, but I didn’t have any.  At this point, I started to stir the sauce continuously.  This breaks down the apples and gives you the nice saucy consistency, as opposed to a bunch of cooked apples sitting in hot water.  I stirred for probably about 5 minutes until the sauce was the chunky consistency I wanted.  If you want it smoother, hopefully you cooked your apples a bit longer to being with and you can be more vigorous with your stirring and add a little mashing action.  And if you want it really smooth, you can run it through your food mill.  Because everyone has a food mill sitting around. 

I dished out the first two bowlfuls while it was still piping hot, and it was delicious!  I thought the chunky-ness of it made it taste like hot apple pie, so I am calling it apple pie sauce.  Steve said it didn’t taste like apple pie to him, but what does he know?

© 2009 The Beehive All Rights Reserved

Creepy Cookies

I went to the craft store last week to get balsa wood to make some faux Roman shades for our guest room.  More on that later.  I expected to do a little browsing because this particular store was new to me, but I was unprepared for the 60% off Halloween and general fall decorations that assaulted me as I walked in the door, so of course I had to walk away with a few items, including a haunted gingerbread house kit. 

I’ve been known to create a gingerbread house or two in the past:

I thought the kit would be a quick little diversion without the headache of making my own gingerbread and icing, deciding what kind of candy I wanted to decorate with, etc.  This particular kit came with pre-cut cookie pieces, packets of orange and black icing mix, two piping bags with decorator tips, various candies for decorating, and directions for decorating in three alternative styles, which I promptly threw out the window when I got to the part about letting the base of the house set for an hour before proceeding. 

I was amazed that these two pale powders mixed up to bright orange and deep black with just a couple tablespoons of water.  I was a bit disappointed in the consistency, though.  The orange was extremely runny after  following the mixing instructions and I had no powdered sugar to add to stiffen it up.  Another reason I threw the directions out: I couldn’t do the suggested piping with such loose icing.  The instructions also suggested cutting the jellybeans in half with a sharp knife.  Have you ever tried cutting stale jellybeans in half?  I just about cut my fingers off three or four times, and I don’t recommend it. 

Despite the few minor hiccups, this is how it turned out.  Not my best work, but not bad for an hour or two with a $10 kit.

© 2009 The Beehive All Rights Reserved