Choosing Charity

On my way home from the gym, I pass through an intersection that has a fire station on the corner.  The other day, there were three firemen out on each median at the intersection, wearing their helmets and fireman’s pants over t-shirts.  They each had a fireman’s boot and a sign with the MDA logo that said “Fill the boot for Jerry [Lewis]’s kids!”  They seemed to get quite a reaction, much more so than the average homeless person standing on the median with a cardboard sign.  People were honking and putting money in the boots left and right (get it? they had left boots and right boots, ha!).  Maybe it was the tight t-shirts?

They were out again today, and I thought I could probably spare a dollar.  The only problem: no small bills in my wallet.  The fireman that approached me noticed that I was rifling through the receipts looking for something donate-able and said don’t worry about it, if you’ve got some change in there, that’s enough to help.  So I dumped a palmful of change in the boot and got a nifty sticker, which made me feel like I’d done my good deed for the day.

Muscular dystrophy research is not something I would typically donate to.  I’d more likely give to cancer or heart disease, and I donate used items I no longer want to an organization that provides support to battered women.  But apparently a few firemen can sway my giving trends, at least for a few cents.  What kind of charitable organizations do you support?  What kind of thing would tempt to you expand your giving horizons?

© 2010 The Beehive All Rights Reserved

The Power of Free

We have two additional bedrooms we haven’t shared any pictures of, mostly because they are currently just used for storage and not really fit for viewing.  One of them contains a bed that the former owner, Crazy Myrna, left when she moved out.  It’s a fine bed.  Full size, with a faux wrought iron frame and canopy.  It’s just way, way too big for the room.  If it had an actual fabric canopy on it, the blades of the ceiling fan would slice into it.   So it just doesn’t work for us.

I decided to post it in the “free” section on craigslist.  I suppose we could have sold it, but I really just wanted to get rid of it and I thought free would be the fastest.  And it seemed pretty fast.  Within minutes, I had five responses.  Within a half-hour, 20.  I decided to use the “first come, first served” principle and emailed the first responder.  He said “I can pick it up RIGHT NOW!”  I said hold your horses, you can pick it up when my husband is home from work.  In the meantime, I will take it apart and get it ready to transport.

His wife called a little later to make sure the canopy material in the picture was included because her daughter had really wanted a canopy bed with a pink canopy for a long time and this would be just perfect for her.  She told me her husband would be here to pick it up in an hour.

Ten minutes later, the husband calls and starts asking questions about the mattress.  How old is it?  What brand is it?  How thick is it?  Is it a nice mattress?  Um, are you forgetting that it’s FREE?  It’s a fine mattress.  It’s not a luxury mattress, but it’s FREE.  It’s not a fancy brand like Tempurpedic, Serta, or Beauty Rest, but it’s FREE.  It’s not a 12 inch thick pillow top, but it’s FREE.  So after 2 hours of back and forth regarding the logistics of his pick up of the bed, during which time I passed up on multiple other offers, he decides to pass because the mattress is not new or a brand name.  Earth to Mike S.: no one is giving away brand new Craftmatic Adjustable Beds on craigslist!

Ok, I am calm now.  Sort of.  I guess I am just irked because he didn’t say, “I’m interested, I’d like to take a look at the bed, and I have a few questions.”  He said, “I want it and I will pick it up RIGHT NOW!”  It seems to me there is a contract there.  I offered to give him a bed.  He accepted that offer.  In reliance on his acceptance, I dismantled the bed and brought it downstairs to the front door.  Reliance is a species of consideration.  Geez, will I ever stop talking/thinking like a lawyer?

Now that the guy had breached his contract with me, I had to get rid of the bed sitting in the entry way.  I decided to abandon the first come/first served principle in favor of looking for responses which seemed to indicate that this person could really use a mattress.  Not some yuppie couple from Walnut Creek who want a fantasy bed for their daughter, but someone who maybe is sleeping on the floor and could really benefit from a mattress, even if it is off brand and not a pillow top.

I chose a college student moving into a new rental home.  She picked it up two hours later and didn’t once ask about the brand name.  In fact, she was really thrilled with the bed, and couldn’t believe that Crazy Myrna had left it or that we were giving it away.  The pick up was kind of an adventure.  I had just put a pan on the stove to preheat, and I totally forgot about it while I was helping her with the bed, so smoke alarms were sounding and Steve couldn’t manage to get them to turn off by flipping the circuit breaker.  She will have an interesting craigslist story to tell her friends, anyway.

© 2010 The Beehive All Rights Reserved

“C” is for Cookie

I have a break for a few weeks before I go back to school at the end of the month, so I’ve been trying to be productive around here.  Unfortunately, I got a pretty bad sunburn working in the yard last weekend, so I’ve had to take it easy physically because my shirt rubbing against my tender skin is somewhat uncomfortable and even painful at times.  In other words, no yard work for a few days.

Not wanting to be a total couch potato, I turned to one of my favorite low-key past-times and turned out some fabulous milk chocolate chipsters.  Yum!

I used to bake ALL the time. I think it’s probably been months since I last made a batch of cookies, though, and I didn’t get the satisfaction from baking this batch that I thought I would. Don’t get me wrong, it’s not like it was a chore, and I sure do enjoy eating the fruits of my labor, but I think maybe I’m shifting towards enjoying cooking more than baking.

© 2010 The Beehive All Rights Reserved

I Heard it Through the Grape Vine

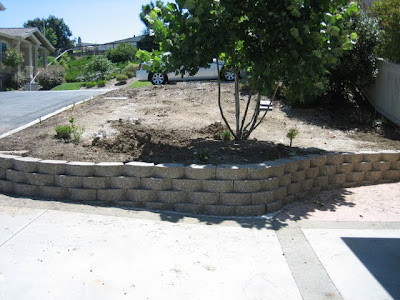
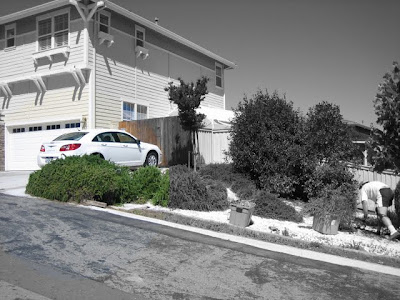
Obviously, we’ve been working a lot in our front yard.  Well, maybe obvious to us because we’ve put in the work, but not so obvious to our neighbors who still have to look at an eyesore of a yard.  It seems like it has taken us forever just to remove all the ugly stuff that was there when we moved in, from bright white landscaping rock, to overgrown rosemary, to weeds.  Well, we finally got to a point where we were ready to add something back in, and we happened to snag a couple of Red Flame grape vines from Costco.

Once we purchased the vines, we were a little bit ahead of ourselves.  We needed something for them to grow on before we could plant them.  We searched the internet for various DIY designs for grape trellises and took the best bits and pieces to create a trellis that suited our needs.  Here are the materials we used:

  • Two 4×4 posts, 8 feet long each
  • Two 2×2 posts, 8 feet long each
  • Wood preservative
  • 10 eyelet bolts, with nuts, about 1/4 inch in diameter
  • 20 1/4 inch washers
  • 5 turnbuckles, about 5 inches long when open
  • 14 guage wire

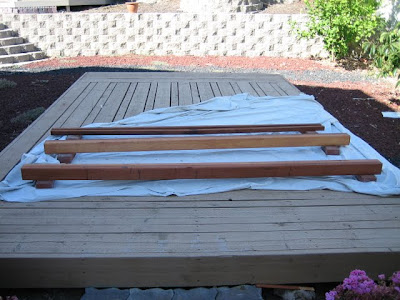
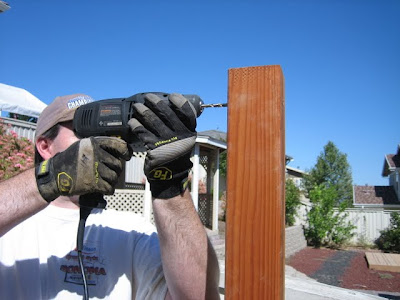
The first thing we did was treat the posts with a wood preservative.  Our posts are redwood, since it holds up well outdoors, so we chose a preservative with a redwood stain to it.  Specifically, Preservawood in Pacific Redwood.  Preservawood is a low-VOC formula, so you won’t be breathing in horrible fumes while you treat the wood and it won’t leach toxic chemicals into the soil once you have the posts placed.

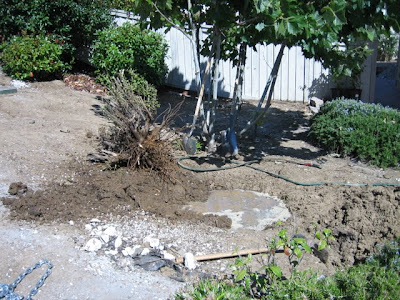
Next, we had to set the posts in the ground.  We wanted them sunk down two feet, so six feet would be exposed for the trellis.  Using a post hole digger, we dug down about 28 inches for each post, and spaced the holes about four feet apart (so the trellis is 12 feet long, from end to end).  The two 4x4s were used for the outside supports, while the 2x2s were used on the inside.

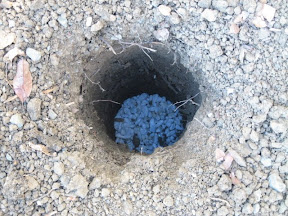
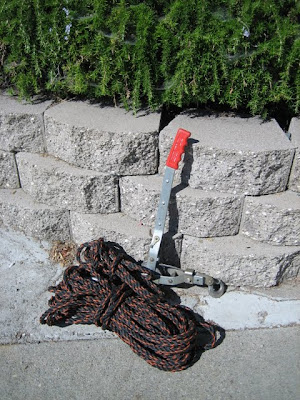
The reason we dug the holes a bit deeper than two feet is that the method we decided to use for setting them involved placing a few inches of gravel on the bottom, then several more inches around the bottom of the post.  But where would we get gravel?

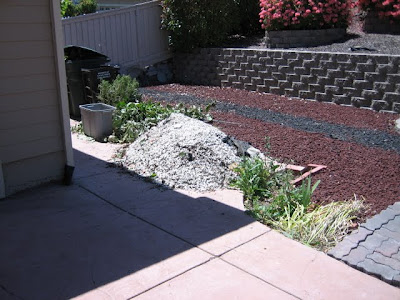
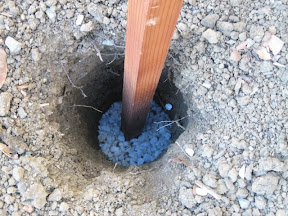
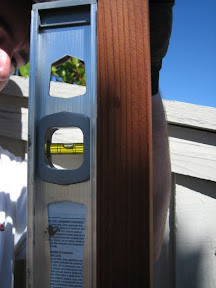
We just happened to have some lying around.   Anyway, we put four inches of gravel at the bottom of each hole, then placed the posts in, used a level to make sure they were straight, then filled around the bottom of the post with gravel for another six inches or so.  Then, we packed the rest of the hole with the dirt we dug out of it, periodically using the level to make sure the post was still straight.

Next, we drilled holes in the posts to stretch the wire across.  We planned on five wires, starting about two feet off the ground and ending about two inches from the top of each post, so we spaced the holes approximately evenly over this space.

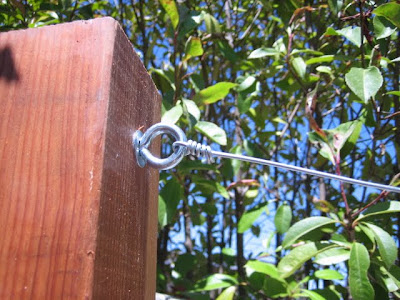
On the outside posts, we put eyelet bolts through and secured them each with a nut.  We put a 1/4 inch washer on either side of each bolt in an attempt to not damage the wood as we tightened the nut.  We planned to just run the wire through the holes in the two smaller posts, since the larger, outer posts were really the major supports for the wire.

Next, we attached a wire to each eyelet (each of these wires was about half the length of the trellis as a whole, so maybe six feet, give or take, with a little extra just in case).  We threaded the wire through each eyelet, bent it with about a three inch overlap, and coiled the overlap around the other side of the wire using a vice grip.  They all looked like this when we were done.

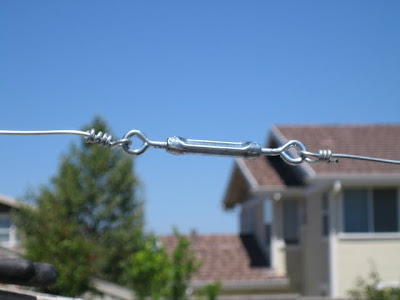
Since each of the wires we threaded through the eyelets was about half the length of the trellis, we needed a way for the left to meet the right in the middle, and we decided to use a turnbuckle for each set of wires.  Maybe Congress could use a few turnbuckles?

In case you were wondering what a turnbuckle is, here is a description from Wikipedia:

A turnbuckle, stretching screw or bottlescrew is a device for adjusting the tension or length of ropes, cables, tie rods, and other tensioning systems. It normally consists of two threaded eyelets, one screwed into each end of a small metal loop, one with a left-hand thread and the other with a right-hand thread. The tension can be adjusted by rotating the loop, which causes both eyelets to be screwed in or out simultaneously, without twisting the eyelets or attached cables,

We coiled a wire from the left side to one end of the turnbuckle and a wire from the right side to the other.  We pulled them as taught as well could initially, but then we still had the ability to adjust the tension even more by rotating the loop on the turnbuckle.

So there you have a pretty basic trellis!

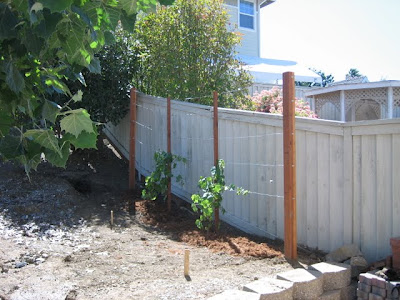
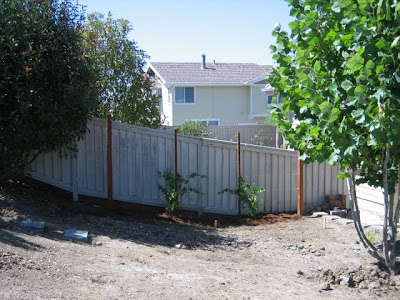
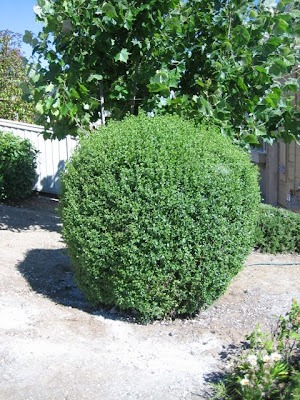
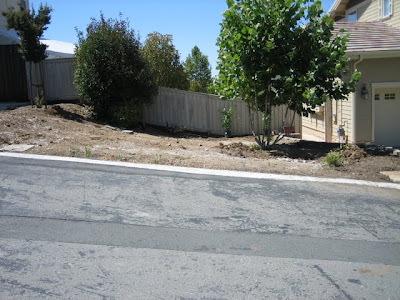
After all that work we still had to plant the grapes.  We tilled the soil with a Mantis tiller, added some soil amendment, and tilled again.  The we just dug a couple of holes and popped the plants in.  Finally, we untied the vines from the bamboo support from the nursery pot and started training them along the new trellis with a little string. I think it looks pretty nice, and has a lot of potential if we don’t kill the grapes and they keep growing up the trellis.

Of course, the rest of the front still looks pretty dreadful.  Baby steps!

© 2010 The Beehive All Rights Reserved

Whose Idea was This Anyway?

I’m talking about the front yard.  Progress has been rather slow for a while.  Steve injured himself pulling out rosemary and really had to take things easy for about two weekends, so not a lot got done.  Plus, we didn’t do a whole lot on the long 4th of July weekend because we were, you know, having fun.  Not that toiling in the yard under the hot summer sun isn’t super fun . . .

We have actually accomplished quite a bit, though, thanks to the Mantis tiller we borrowed from Steve’s parents and my parents’ offer to help us dig out a large shrub.  Specifically, this large shrub:

Its roots looked significantly more daunting than the rosemary we had spent all that time digging out.  Plus, there was a sprinkler right underneath it we would have to be careful not to damage.  It started to make me think of the monolith from 2001: A Space Odyssey.

We started out on our own by just slowing soaking the ground around it and digging in.  It seemed like we didn’t do much but create a moat around it.

My dad has some experience with stump removal, so when he offered to help us get this one out, we jumped at the chance.  He brought a special tool:

That metal thing with the red handle is a fancy ratcheting thingy.  And yes, that is a technical term of art.  Essentially he wrapped a chain around the based of the roots to the ratchet, then a rope from the other end of the ratchet to a stationary object (we used the trailer hitch on Steve’s car).  Pull the ratchet a few time, and the stump comes right out.  Well, maybe it’s not quite that easy, but I decided I wanted to take a picture of the process and when I got back with my camera this is what I saw.

It was that quick.  What we were thinking digging out the rosemary without this handy helper?!?  To be sure, we put it to use on the rest of the rosemary in the front. Here’s my dad, and Steve’s car, working on that.

So we are pretty much done removing stuff and have a clean slate to start laying out the new yard and planting stuff.

Ok, ok, we have actually started planting a little bit, and it looks pretty good.  But that’s for another post, so stay tuned!

See our yard progress from the beginning here and here.

© 2010 The Beehive All Rights Reserved

Corny Cooking

Steve and I haven’t been doing a whole lot of cooking lately.  In fact, we’ve been so lazy in the cooking department, we’re not beyond eating ramen noodles for dinner.  I blame it on the hot weather.  Who wants to slave over a hot stove when it’s 90+ degrees?

This months issue of Real Simple inspired me to try some new things, though.  Digression:  my subscription to Real Simple was a Christmas gift from my sister.  Every month, the address label says “A Gift from Christine,” which of course reminds me of how sweet my sister is.

But back to the food.  The August issue contained a whole bunch of recipes with only three ingredient, which I love because grocery shopping is so much quicker when there is not much to buy, not to mention cheaper.  But it was really one of the week night meals that caught my eye: Cajun Skirt Steak with Creamed Corn.  More than three ingredients, but still pretty simple and quick.

Let’s start with the main course, the steak.  Remember how I said less ingredients make grocery shopping easier?  Well, it also makes it more likely that someone who does not make a list gets all the ingredients right.  For some reason, I had flank steak stuck in my head, so I bought a flank steak instead of a skirt steak.  Both cuts come from the underbelly of the cow, but the flank comes from — surprise — the flank, which is towards the rear, while the skirt comes from the plate, which is more towards the front.  In other words, the skirt comes from the kosher part of the cow while the flank does not.  Both contain a lot of connective tissue and can be tough if not prepared right.   They are both flat pieces of meat, but flank is a little bit on the thicker side.

So we went with the flank steak, since it’s what we bought.  Preparation couldn’t have been simpler.  Preheat the broiler.  Place the steak on a broiler  safe sheet pan and liberally season with Cajun seasoning, salt, and pepper.  Broil 3-4 minutes on each side for medium-rare, then rest for 5 minutes before slicing.  I tend to prefer my meat medium, rather than medium-rare, so we used the longer end of the range, 4 minutes per side.  But, remember how I said flank steak was thicker than skirt steak?  It was still pretty rare.  So I would recommend cooking a bit longer if for some reason you use a flank steak.

In spite of being a little rare for our tastes, it was still delicious.  Sliced on an angle after resting, it was tender and juicy and oh-so-tasty.

On to the side dish, creamed corn made with fresh corn.  The recipe called for 8 ears of corn, but there are only two of us, so we decided to cut it in half.  I cut the kernels off four fresh ears of corn.  This is trickier than it looks.  I find my hands tend to get slippery, and holding the corn up on end is not terribly stable, so be careful here.  We ended up with at least 2 cups of kernels, probably more, actually.

Remember how I bought the wrong kind of steak because I didn’t make a list before I went to the store?  I also bought the wrong kind of onion.  For some reason I thought it called for a Vidalia or other sweet onion, so I bought a Walla Walla onion.  Turns out the recipe just called for a regular yellow onion.  Anyway, I chopped up half of it and sauted it over medium-high heat for about 5 minutes with a tablespoon of butter until it started to soften.  Then, in went the corn kernels, some salt and pepper, and 1/2 cup of half-and-half.  That cooked for another 5-8 minutes or so, until the creamy sauce thickened up.  Even with the wrong onion, the corn was out of this world!  So sweet, creamy, and delicious.

We served this meal up with a mixed green salad.  I am sure we will make this again.  Even when corn is out of season, you can use frozen corn as long as you add a little flour to help thicken things up (frozen corn does not have as much starch in it as fresh), so it won’t be just a summer treat.

© 2010 The Beehive All Rights Reserved

Looking a $20,000 Gift Horse in the Mouth

The other day, I was watching a video on CNN Money entitled “How Would You Spend $20,000?”  Unfortunately, I can’t figure out how to link to it, but if you go to CNN.com and click on the Money tab, you’ll probably see it in the video section.  They asked people on the street what they would do if they had $20,000 to spend.  Most of the responses were unremarkable: pay bills, pay off student loans, take a vacation, buy a new car, that sort of thing.  One respondent, however, had a tough time with the question.  First, he said he’d like to buy a loft, but he’d need $2 million in addition to the original $20,000.  Ultimately, he couldn’t really answer because $20,000 is just “not that much.”  Really?  Someone drops twenty grand in your lap and you can’t figure out how to spend it because it’s not enough?

Personally, I’d probably put $5,000 towards rebuilding the transmission in Steve’s car, put some towards the little yard project we’ve been working on, then put the rest in the bank.

What would you do with $20,000?

© 2010 The Beehive All Rights Reserved

More Yardage

We continued with our work on the front yard this past weekend.  Thankfully, it was not nearly as hot as last weekend (although I did neglect to wear sunscreen on Sunday and got a bit burned!).  Last weekend, we cleared out scattered rosemary bushes and white landscaping rock from the center of the yard area.  This weekend, our goal was to remove the mature rosemary and white landscaping rock from the top of the slope.

The mature rosemary plants were much more of a struggle than the smaller ones we removed last week.  The roots tend to grow sideways, which meant we did not have to dig terribly deep, but there were a lot of roots and some of them were very large.

Steve also somehow twisted his elbow pulling out those big plants, so he was mostly sidelined on Sunday.  That meant I did the majority of the rock-shoveling and carrying it into the back.  Tough work for one person!

Here’s what are neighbors are looking at now:

Next weekend we’ll be heading down to the bottom of the slope.  Hopefully we can clear the last of the rock, but I’m sure the remaining mature rosemary will be an ordeal, as will the large, unidentified bush in from of the Mulberry tree, so it may take us a while to get that done.

© 2010 The Beehive All Rights Reserved

Hallmark in Cahoots with the USPS?

Like many of you, I addressed, stamped, and mailed some Father’s Day cards last week.  One in particular struck me as a bit strange because the envelope was marked “Extra Postage Required” in the stamp area.  The card did not seem to me to be particularly heavy, so I broke out our kitchen scale and weighed the whole thing before I sent it.  Sure enough, the card and envelope together were less than an ounce, requiring zero extra postage.  It just made me wonder, what’s the deal?  I am sure a lot of people would have put that extra postage on as instructed without giving it an extra thought.  How many cards out there are like that?

Greeting cards are virtually the only thing I send through the U.S. Mail these days (and, much as I hate to admit it, I really don’t send many of those).  Bills are paid online, and I send email instead of letters.  I know the Postal Service is a real money loser at this point — could they be teamed up with greeting card companies to find a sneaky way to increase revenue?  I know it’s a stupid, paranoid conspiracy theory, but it doesn’t seem all that far-fetched when you think about the way greeting card companies essentially manufactured holidays to provide themselves with business.

On a lighter note, happy belated Father’s Day to all you dads out there, especially my dad!

© 2010 The Beehive All Rights Reserved

Allison’s New Bib

My mom busted out her sewing machine and made this clever new bib for my niece, Allison.  She bought a tea towel with a fun stripe on it, cut a hole towards one end of it, and edged the hole with ribbing to slip over the baby’s head.

Voila, it’s a bib that provides way more coverage than a typical bib for messy feedings.

Allison looks super-cute in it too.  Of course, she’s always cute.

© 2010 The Beehive All Rights Reserved